Blog

  • Cabbage Soup – Very Healthy, So Delicious, and Perfect for Rainy Days

    Cabbage Soup – Very Healthy, So Delicious, and Perfect for Rainy Days

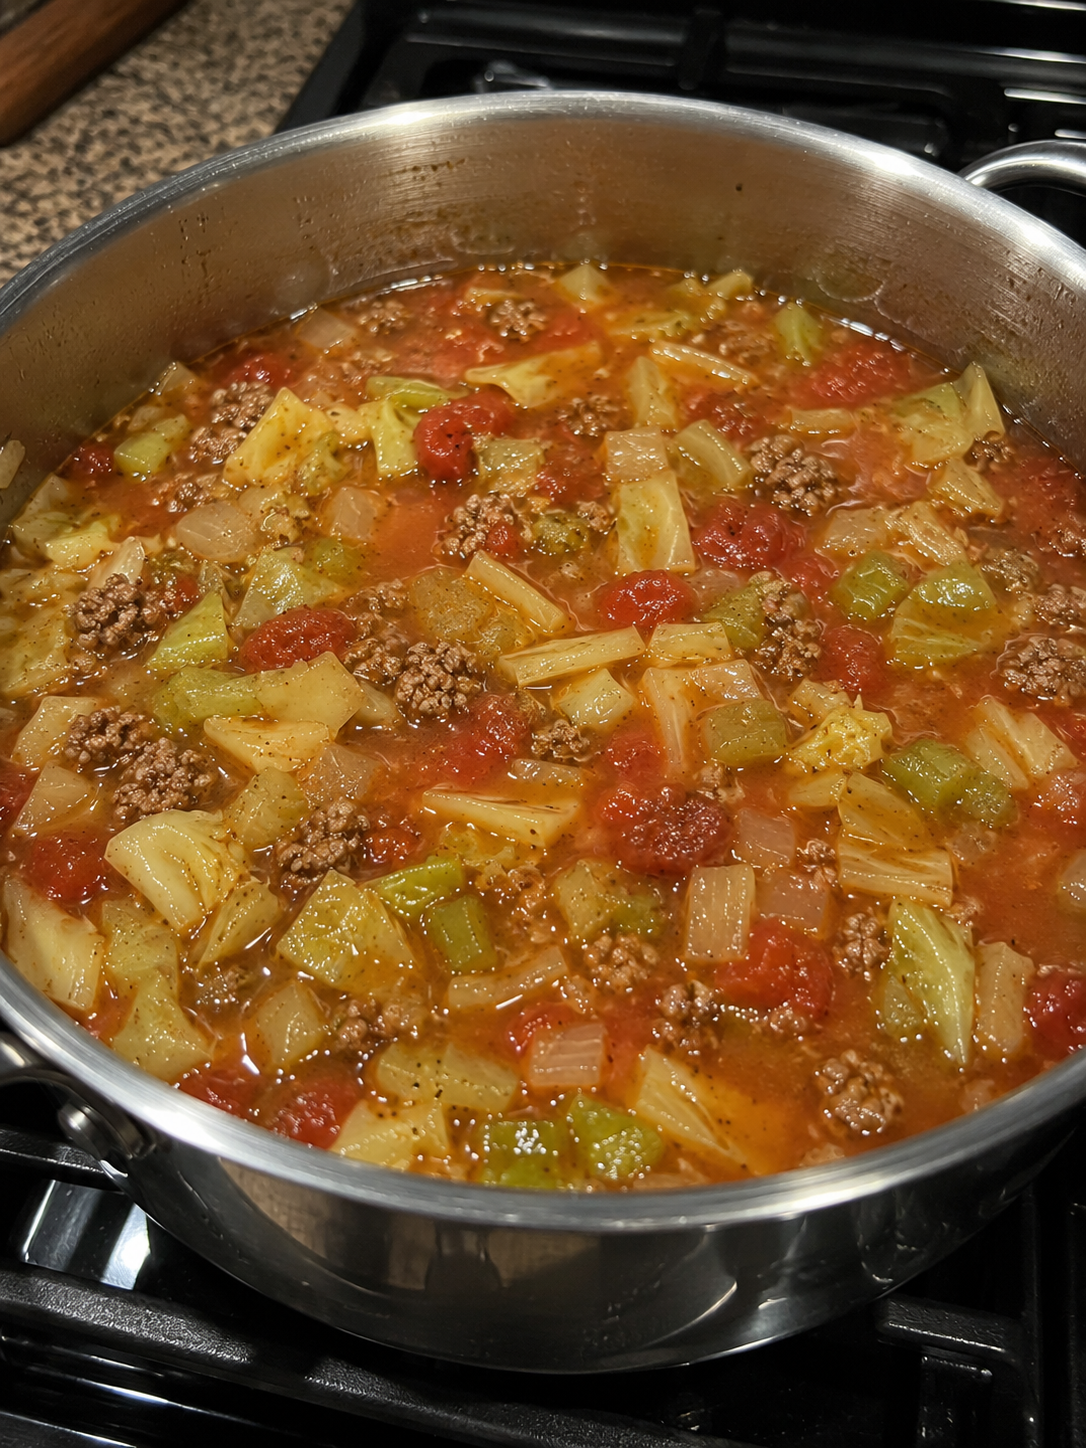
    There are soups that are healthy but bland, and then there is this Cabbage Soup – the kind that is very healthy, so delicious, and perfect for rainy days. Imagine a steaming bowl of tender cabbage, sweet stewed tomatoes, savory ground beef, and a rich, umami‑packed broth infused with Lipton Onion Soup Mix. This is not a punishment diet soup. This is real, hearty, comforting food that happens to be incredibly good for you. Whether you are looking to eat cleaner, warm up on a cold day, or simply enjoy a bowl of old‑fashioned goodness, this cabbage soup delivers. If you are searching for a healthy cabbage soup recipe that is packed with flavor and easy to make, this is the one.

    This soup has been a favorite for generations. It is budget‑friendly, uses simple pantry staples, and comes together in one pot. The combination of cabbage, onions, celery, stewed tomatoes, ground beef, and Lipton Onion Soup Mix creates a broth that is savory, slightly sweet, and deeply satisfying. This cabbage soup with ground beef will become your go‑to for busy weeknights, meal prep, or when you need a little comfort in a bowl.

    In this complete guide, you will learn the master recipe for cabbage soup (based on the ingredients you provided), pro tips for the best flavor, delicious variations (add beans, use turkey, or make it vegetarian), storage and freezing instructions, and why this soup is especially great for rainy days. Let’s get that pot simmering.

    Why This Cabbage Soup Is So Popular (And So Good for You)

    Cabbage has long been celebrated as a health powerhouse – it is low in calories, high in fiber, packed with vitamins C and K, and full of antioxidants. When combined with lean ground beef, tomatoes, and a savory onion soup mix, it transforms into a meal that is filling, flavorful, and nourishing. This soup is naturally gluten‑free (check your soup mix), high in protein, and loaded with vegetables. It is the kind of meal you can eat without guilt, and it tastes so good you will want seconds. This is a low calorie high protein cabbage soup that works for weight loss, healthy eating, or just a cozy dinner.

    Here is why you will love it:

    • Only 20 minutes of prep – Then simmer to perfection.
    • Incredibly flavorful broth – Thanks to Lipton Onion Soup Mix and stewed tomatoes.
    • Packed with cabbage and vegetables – Fiber and nutrients.
    • Protein‑rich – Ground beef makes it hearty and satisfying.
    • Budget‑friendly – Cabbage and ground beef are inexpensive staples.
    • Great for meal prep and freezing – Tastes even better the next day.
    • Perfect for rainy days, cold weather, or when you need comfort food

    Once you try this easy cabbage soup recipe, you will understand why it has been a family favorite for decades.

    The Complete Cabbage Soup Recipe

    This recipe serves 8‑10 people. It can easily be doubled for a crowd.

    Ingredients:

    • 1 large head of cabbage, cored and chopped (about 8‑10 cups)
    • 2 small onions, diced
    • 2 cans (14.5 oz each) stewed tomatoes (with juices)
    • 1 pouch (about 1 oz) Lipton Onion Soup Mix (any flavor – beefy onion or regular)
    • 1 large celery stalk, chopped very small (about 1 cup)
    • 1 to 2 lbs (450-900g) lean ground beef (use 1 lb for lighter soup, 2 lbs for heartier)
    • Water (enough to fill the pot halfway – about 8-10 cups)
    • Optional spices to taste: garlic powder, black pepper, paprika, red pepper flakes, dried thyme, or bay leaves
    • Salt to taste (add at the end; the soup mix is salty)
    • Optional garnish: fresh parsley, sour cream, or shredded cheese

    Equipment:

    • Large saucepan or Dutch oven (6‑8 quarts)
    • Large skillet (for browning ground beef)
    • Cutting board and knife
    • Wooden spoon

    Step‑by‑Step Instructions

    Step 1 – Prepare the Vegetables

    Core the cabbage and chop it into bite‑sized pieces (about 1‑2 inches). Dice the onions finely. Chop the celery into very small pieces – this helps it melt into the broth. Open the cans of stewed tomatoes. If you prefer a smoother texture, you can break up the tomatoes with your hands or a spoon, but leaving them whole adds nice chunks of flavor.

    Step 2 – Start the Soup Base

    Fill your large saucepan or Dutch oven halfway with water (about 8‑10 cups). Bring the water to a boil over high heat. Once boiling, add the chopped cabbage, diced onions, chopped celery, and the cans of stewed tomatoes (including the juices). Stir to combine. Reduce the heat to a simmer.

    Step 3 – Cook the Ground Beef Separately

    While the vegetables are simmering, heat a large skillet over medium‑high heat. Add the ground beef and cook until browned, breaking it up into small crumbles with a spatula, about 7‑10 minutes. Drain any excess fat. Do not skip draining – excess grease will make the soup greasy.

    Step 4 – Season the Soup

    Add the Lipton Onion Soup Mix to the simmering vegetables. Stir well. This soup mix is the secret to the deep, savory flavor. Add any additional spices you like – garlic powder, black pepper, paprika, red pepper flakes, or a bay leaf are all excellent choices. Taste the broth and add salt only at the end (the soup mix is already salty).

    Step 5 – Add the Meat and Simmer

    Add the browned ground beef to the soup. Stir to combine. Let the soup simmer for another 10‑15 minutes, allowing the flavors to meld. The cabbage should be tender but still have some texture. If you prefer very soft cabbage, simmer longer.

    Step 6 – Taste and Adjust

    Taste the soup. Add more salt, pepper, or spices as needed. If you want more heat, add a pinch of red pepper flakes. If you want more depth, add a splash of Worcestershire sauce or a teaspoon of beef bouillon.

    Step 7 – Serve

    Ladle the hot cabbage soup into bowls. Garnish with fresh parsley, a dollop of sour cream, or a sprinkle of shredded cheese if desired. Serve with crusty bread or crackers. This soup is especially wonderful on rainy days – it warms you from the inside out.

    Pro Tips for the Best Cabbage Soup

    Follow these expert tips for a perfect homemade cabbage soup every time:

    • Use a large pot – Cabbage takes up a lot of space but wilts as it cooks. A 6‑8 quart Dutch oven is ideal.
    • Cut the cabbage uniformly – Evenly sized pieces cook at the same rate. Remove the tough core before chopping.
    • Brown the ground beef well – Don’t just cook it until it’s no longer pink; let it get a little caramelized for deeper flavor. Drain the fat thoroughly.
    • Do not add salt too early – The Lipton Onion Soup Mix and stewed tomatoes already contain sodium. Add salt at the end after tasting.
    • Simmer, do not boil vigorously – A gentle simmer allows the flavors to meld without breaking down the vegetables into mush.
    • Make it a day ahead – Like many soups, this cabbage soup tastes even better the next day. The cabbage softens and the flavors deepen.
    • Customize the spice level – Add red pepper flakes, cayenne, or a diced jalapeño for heat. Add smoked paprika for a smoky note.

    Delicious Variations (Same Base Recipe)

    Once you master the classic cabbage soup, try these fun twists. These cabbage soup variations will keep your meals exciting.

    1. Italian Cabbage Soup

    Add 1 teaspoon of dried oregano and 1 teaspoon of dried basil. Use Italian sausage instead of ground beef (casings removed). Add 1 can of cannellini beans (rinsed) during the last 10 minutes.

    2. Spicy Cabbage Soup

    Add 1 teaspoon of cayenne pepper, 1 teaspoon of red pepper flakes, and 1 diced jalapeño (seeds removed). Use spicy ground sausage or add a splash of hot sauce before serving.

    3. Low‑Carb / Keto Cabbage Soup

    Omit the stewed tomatoes (or use a small amount) to reduce carbs. Use full‑fat ground beef. This keto cabbage soup is perfect for low‑carb dieters.

    4. Turkey Cabbage Soup (Lighter)

    Replace ground beef with lean ground turkey. Use low‑sodium broth instead of water. The result is a lighter, lower‑calorie version.

    5. Vegetarian Cabbage Soup

    Omit the ground beef. Add 1 can of kidney beans or chickpeas (rinsed) and 1 cup of diced carrots for extra heartiness. Use vegetable broth instead of water. This vegetarian cabbage soup is just as satisfying.

    6. Cabbage Soup with Rice or Barley

    Add ½ cup of uncooked brown rice or pearl barley along with the vegetables. Simmer until the grain is tender (about 30‑40 minutes). This makes the soup even heartier.

    7. Cabbage and Potato Soup

    Add 2 diced potatoes along with the cabbage. The potatoes add starch and creaminess. This version is extra filling.

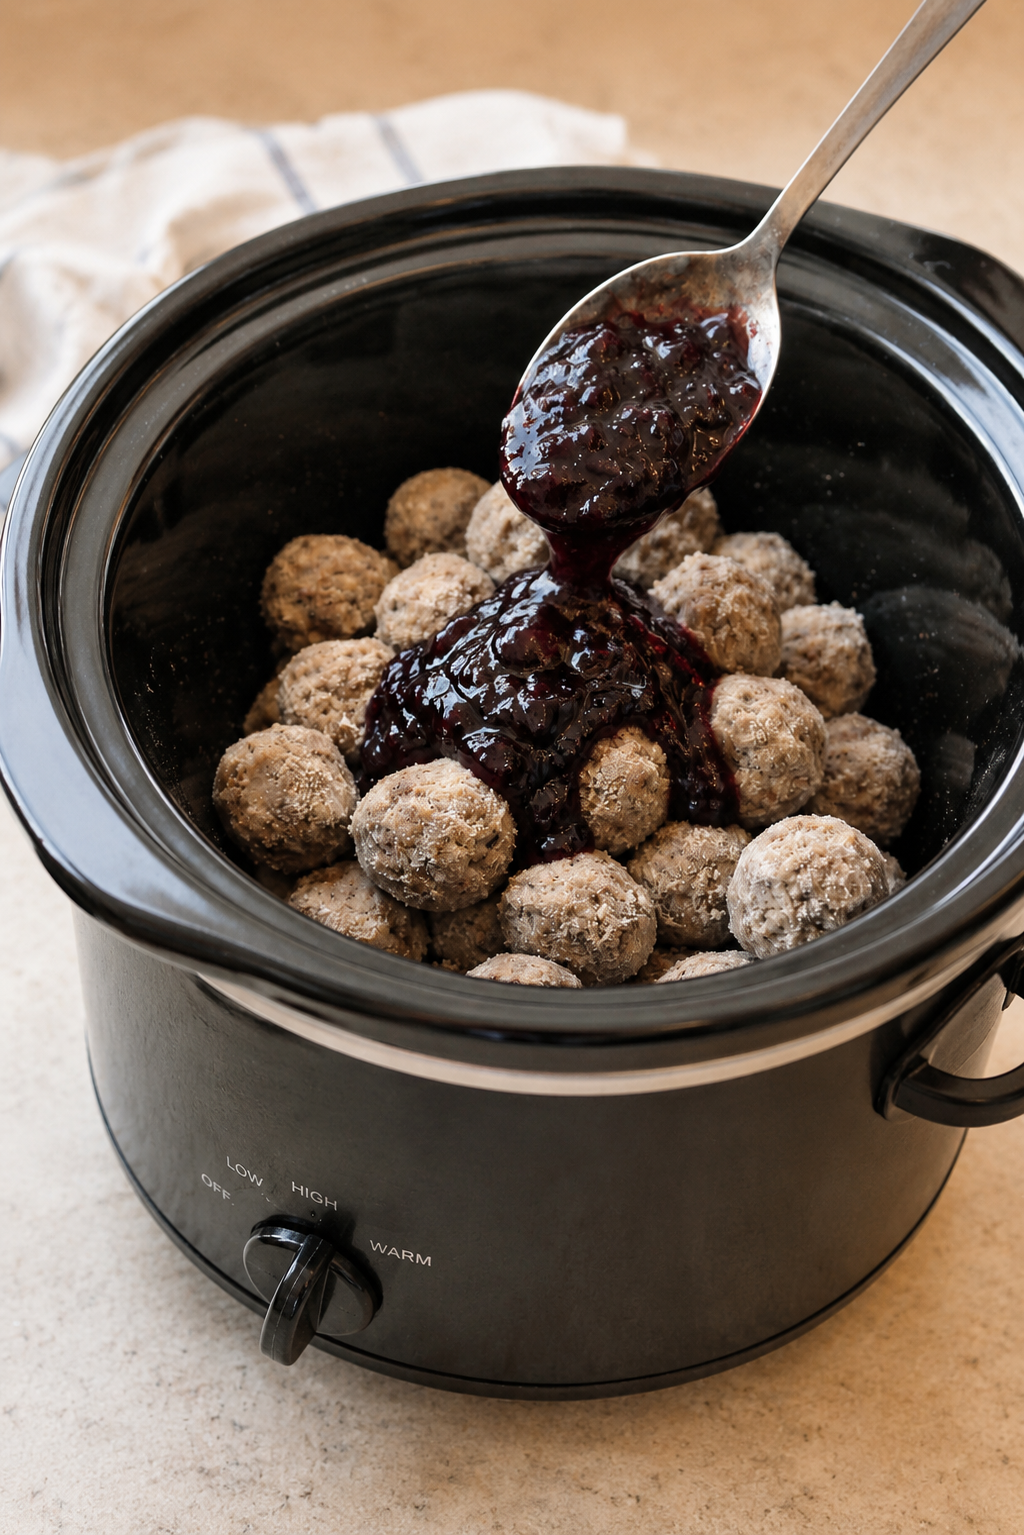
    Brown the ground beef in a skillet first. Transfer to a slow cooker. Add all other ingredients. Cook on LOW for 6‑7 hours or HIGH for 3‑4 hours. The cabbage will be very tender.

    How to Store, Freeze, and Make Ahead

    Refrigerator

    Store leftover cabbage soup in an airtight container for up to 5 days. The flavors meld and improve over time.

    Freezer

    This soup freezes beautifully. Cool completely, then transfer to freezer‑safe containers or bags. Freeze for up to 3 months. Thaw overnight in the refrigerator. Reheat on the stovetop or in the microwave.

    Make Ahead for a Party

    Make the soup 1‑2 days ahead, cool, and refrigerate. Reheat gently before serving. The taste will be even better.

    What to Serve with Cabbage Soup

    • Crusty bread or dinner rolls – For sopping up the broth.
    • Cornbread – A classic pairing.
    • A dollop of sour cream or Greek yogurt – Adds creaminess.
    • Shredded cheddar or Parmesan cheese – Melts into the hot soup.
    • Fresh parsley or dill – Brightens the flavor.
    • Hot sauce or red pepper flakes – For heat lovers.
    • A simple green salad – For a complete meal.

    Why This Soup Is Especially Great on Rainy Days

    There is something magical about a pot of soup simmering on the stove when the rain is tapping against the windows. The steam rises, the kitchen fills with the aroma of onions, cabbage, and seasoned beef, and you know that in a few minutes, you will be sitting down to a bowl of pure comfort. This cabbage soup is not just food – it is a feeling. It warms your hands around the bowl, fills your belly, and makes the grayest day feel a little brighter. That is why this soup is perfect for rainy days, cold evenings, or any time you need a little extra warmth.

    Frequently Asked Questions

    Can I use a different type of onion soup mix?

    Yes. Lipton makes Beefy Onion, French Onion, or regular Onion Soup Mix. Any of them work beautifully. You can also use homemade onion soup mix (onion powder, beef bouillon, parsley, etc.).

    Can I use fresh tomatoes instead of canned?

    Yes. Use 4‑5 large fresh tomatoes, chopped. You may need to add a little tomato paste for depth since canned stewed tomatoes have added seasonings.

    Why is my soup bland?

    If the soup tastes bland, it likely needs more salt (add at the end) and an acid. A splash of apple cider vinegar or lemon juice brightens the flavors. Also, make sure you used the Lipton Onion Soup Mix – it is essential for the signature taste.

    Can I make this without meat?

    Absolutely. Omit the ground beef and add a can of beans or extra vegetables like carrots and bell peppers. Use vegetable broth for more flavor.

    How many calories are in a serving of cabbage soup?

    One serving (using 1 lb of lean ground beef) contains approximately 250‑350 calories, 12g fat, 28g carbohydrates, and 18g protein. This is a healthy low calorie soup that is very filling.

    Can I add other vegetables?

    Yes! Bell peppers, carrots, zucchini, green beans, or mushrooms are great additions. Add them along with the cabbage.

    Is this soup good for weight loss?

    Yes. It is low in calories, high in fiber, and packed with protein. Many people use cabbage soup as part of a healthy eating plan. Just watch portion sizes and avoid high‑calorie toppings.

    The History of Cabbage Soup (And Why It Never Goes Out of Style)

    Cabbage soup has been a staple in European and American kitchens for centuries. Cabbage is one of the most affordable and durable vegetables, making it a favorite in times of scarcity. The famous “cabbage soup diet” gained popularity in the 1980s and 1990s, but the soup itself has always been a comfort food classic. This version, with ground beef and Lipton Onion Soup Mix, is a beloved American adaptation from the 1950s and 1960s, when convenience products like soup mixes became pantry staples. Today, it remains a go‑to recipe for busy families, health‑conscious cooks, and anyone who loves a hearty bowl of soup.

    Why You Should Make This Cabbage Soup This Week

    You probably have cabbage in the fridge (or can buy one for pennies), ground beef in the freezer, and stewed tomatoes and soup mix in the pantry. In about 30 minutes, you can create a pot of soup that will feed your family for days. It is perfect for:

    • Busy weeknights – One pot, minimal cleanup.
    • Meal prep for the week – Make a large batch on Sunday.
    • Cold or rainy days – Warms you from the inside.
    • Weight loss or healthy eating – Low calorie, high nutrition.
    • When you need a taste of nostalgia – Reminds you of grandma’s kitchen.

    The first time I made this cabbage soup, it was a rainy autumn day, and I had a head of cabbage that needed using. I threw in the ingredients, let it simmer, and my family gathered around the stove with bowls in hand. The smell alone brought everyone to the kitchen. We ate it with crusty bread, and there were no leftovers. Now I make it whenever the weather turns gray or when I need a healthy, comforting meal.

    So chop that cabbage, brown that beef, and get ready to make the most delicious, healthy, soul‑warming cabbage soup of your life – especially perfect for rainy days.

    Final Thoughts

    Cabbage Soup is proof that healthy food does not have to be boring. This version, with tender cabbage, savory ground beef, sweet stewed tomatoes, and the magic of Lipton Onion Soup Mix, is bursting with flavor. It is very healthy, so delicious, and especially perfect for rainy days. Whether you keep the classic recipe or experiment with Italian spices, beans, or a spicy kick, this soup will earn a permanent spot in your rotation. This truly is the best cabbage soup recipe for healthy comfort food.

    So go ahead – make it today. Ladle it into bowls, breathe in the steam, and enjoy every hearty, comforting, healthy bite.


    Have you made this cabbage soup? What’s your favorite twist – spicy, with beans, or extra vegetables? Share your photos and tips in the comments below. And if this soup warmed you up on a rainy day, save it for later or send it to a friend who needs a healthy, delicious meal.

  • Creamy Slow Cooker Chicken Pasta – The Set-It-and-Forget-It Dinner Your Family Will Beg For

    Creamy Slow Cooker Chicken Pasta – The Set-It-and-Forget-It Dinner Your Family Will Beg For

    There are pasta dinners that require multiple pots and constant stirring, and then there is this Creamy Slow Cooker Chicken Pasta – the kind of meal that makes you wonder why you ever cooked any other way. Imagine tender, juicy chicken breasts simmering all day in a rich, velvety cream sauce infused with garlic, Parmesan, and Italian herbs. Then, in the last 30 minutes, you stir in pasta that cooks right in the slow cooker, absorbing all that incredible flavor. The result is a one‑pot, no‑boil, incredibly creamy pasta dinner that tastes like you spent hours in the kitchen – but your slow cooker did all the work. If you are searching for a creamy slow cooker chicken pasta recipe that is easy, comforting, and guaranteed to be a hit, this is the one.

    Whether you need a busy weeknight dinner, a meal prep hero, or a dish to feed a hungry crowd, this creamy chicken pasta delivers. It uses simple ingredients, requires almost no hands‑on time, and tastes even better the next day. This crockpot creamy chicken pasta will become a family favorite.

    In this complete guide, you will learn the master recipe for creamy slow cooker chicken pasta, including pro tips for preventing curdled sauce and mushy pasta, delicious variations (add sun‑dried tomatoes, spinach, or bacon), storage and freezing instructions, and why this set‑it‑and‑forget‑it dinner is a total game‑changer. Let’s dust off that slow cooker.

    Why This Creamy Slow Cooker Chicken Pasta Is a Weeknight Hero

    Traditional creamy pasta dishes require constant attention – boiling pasta, making a roux, whisking cream, and combining everything at the last minute. This slow cooker version flips that script. You dump chicken, broth, cream cheese, and seasonings into the crockpot in the morning. By dinner time, the chicken is fall‑apart tender and the sauce is rich and flavorful. Then you add uncooked pasta directly to the slow cooker, and it cooks to perfection in the creamy sauce, absorbing every bit of flavor. No separate pot of boiling water, no draining, no extra dishes. This is a one pot slow cooker pasta that will change the way you think about weeknight dinners.

    Here is why you will love it:

    • Only 15 minutes of prep – Then the slow cooker takes over.
    • No boiling pasta separately – It cooks right in the sauce.
    • Incredibly creamy and flavorful – Thanks to cream cheese and Parmesan.
    • Perfect for busy days – Set it in the morning, eat at dinner.
    • Customizable – Add spinach, sun‑dried tomatoes, or mushrooms.
    • Great for meal prep and leftovers – Tastes even better the next day.
    • Kid‑approved and adult‑loved – A guaranteed crowd‑pleaser.

    Once you try this easy crockpot chicken pasta, you will never go back to stovetop creamy pastas.

    The Complete Creamy Slow Cooker Chicken Pasta Recipe

    This recipe serves 6‑8 people. It fits a 6‑quart slow cooker. You can easily double for larger crowds.

    Ingredients – For the Slow Cooker Base:

    • 1.5 to 2 lbs (680-900g) boneless, skinless chicken breasts (or thighs)
    • 1 cup (240ml) low‑sodium chicken broth
    • 8 oz (226g) cream cheese, softened and cut into cubes
    • 1 packet (1 oz) dry Ranch seasoning mix (or Italian seasoning mix)
    • 1 teaspoon garlic powder
    • ½ teaspoon onion powder
    • ½ teaspoon black pepper
    • ½ teaspoon salt (add at the end – cream cheese and broth may be salty)

    Ingredients – For the Pasta and Finish:

    • 12 oz (340g) short pasta – penne, rotini, rigatoni, or fusilli (not long noodles like spaghetti)
    • 1 cup (120g) shredded Parmesan cheese (freshly grated is best)
    • ½ cup (120ml) heavy cream or half‑and‑half (adds extra creaminess)
    • Optional add‑ins: 2 cups fresh spinach, ½ cup sun‑dried tomatoes (chopped), 4 slices cooked bacon crumbled, ½ cup diced mushrooms
    • Fresh parsley for garnish

    Equipment:

    • 6‑quart slow cooker
    • Tongs (for removing chicken)
    • Forks (for shredding)
    • Measuring cups and spoons

    Step‑by‑Step Instructions

    Step 1 – Layer Ingredients in the Slow Cooker

    Place the chicken breasts (or thighs) in the bottom of the slow cooker. Sprinkle with garlic powder, onion powder, and pepper. Add the cream cheese cubes on top of and around the chicken. Pour in the chicken broth. Sprinkle the dry Ranch seasoning mix (or Italian seasoning) over everything. Do not stir – just let the ingredients sit. Cover with the lid.

    Step 2 – Slow Cook

    Cook on LOW for 4‑5 hours or on HIGH for 2‑3 hours. The chicken is done when it shreds easily with a fork and the internal temperature reaches 165°F (74°C). Chicken breasts can dry out if overcooked, so check at the lower end of the time range. For even more tender, foolproof results, use boneless chicken thighs.

    Step 3 – Shred the Chicken

    Remove the chicken from the slow cooker with tongs and place on a cutting board. Use two forks to shred the chicken into bite‑sized pieces. Return the shredded chicken to the slow cooker. Whisk the sauce vigorously – the cream cheese should be fully melted and incorporated into the broth, creating a creamy, smooth sauce. If the sauce seems thin, leave the lid off and cook on HIGH for 15‑20 minutes to reduce slightly.

    Step 4 – Add the Pasta

    Add the uncooked pasta directly to the slow cooker. Stir well to ensure the pasta is submerged in the creamy sauce. If the sauce seems too thick, add an extra ½ cup of broth or water. Cover and cook on HIGH for 25‑35 minutes, stirring once halfway through, until the pasta is tender. Cooking times vary by pasta shape – check at 25 minutes. Do not overcook, or the pasta will become mushy.

    Step 5 – Add Cream, Parmesan, and Optional Mix‑Ins

    Once the pasta is cooked, reduce the heat to low or turn off the slow cooker. Stir in the heavy cream (or half‑and‑half) and shredded Parmesan cheese. If you are adding spinach, sun‑dried tomatoes, or bacon, fold them in now – the residual heat will wilt spinach in 2‑3 minutes. Stir gently until everything is combined and the cheese is melted. Taste and add salt only if needed (the Parmesan and Ranch seasoning are already salty).

    Step 6 – Serve

    Garnish with fresh parsley and extra Parmesan. Serve immediately. This creamy crockpot chicken pasta is rich, satisfying, and absolutely delicious.

    Pro Tips for the Best Creamy Slow Cooker Chicken Pasta

    Follow these expert tips for a perfect slow cooker creamy pasta every time:

    • Use chicken thighs for extra juiciness – They are more forgiving and stay tender even if cooked a little longer.
    • Do not add the pasta too early – Pasta only needs 25‑35 minutes on HIGH. Adding it earlier will result in mushy, overcooked pasta.
    • Use short, sturdy pasta shapes – Penne, rotini, rigatoni, or fusilli hold up well. Avoid long noodles like spaghetti or fettuccine, which can clump.
    • Shred the chicken before adding pasta – This ensures even distribution and helps the sauce thicken.
    • Stir the pasta halfway through cooking – Prevents sticking and ensures even cooking.
    • Add cream and Parmesan at the end – Dairy can curdle if cooked for too long. Stirring them in at the end keeps the sauce smooth and creamy.
    • If the sauce is too thin, remove the lid and cook on HIGH for 15‑20 minutes before adding pasta – This reduces and thickens the liquid.
    • Double the recipe for a crowd – Use a 7‑8 quart slow cooker and increase cooking time by 30‑60 minutes on LOW.

    Delicious Variations (Same Slow Cooker Method)

    Once you master the classic creamy chicken pasta, try these fun twists. These slow cooker pasta variations will keep your dinners exciting.

    1. Sun‑Dried Tomato and Spinach Chicken Pasta

    Add ½ cup of chopped sun‑dried tomatoes (oil‑packed, drained) and 2 cups of fresh spinach along with the Parmesan and cream. The tomatoes add tangy sweetness, and the spinach wilts beautifully.

    2. Bacon Ranch Chicken Pasta

    Add ½ cup of cooked crumbled bacon along with the shredded chicken. Use Ranch seasoning mix (already in the recipe). Top with extra bacon and green onions.

    3. Cajun Creamy Chicken Pasta

    Replace the Ranch seasoning with 1 tablespoon of Cajun or Creole seasoning. Add ½ cup of diced andouille sausage along with the chicken. The spicy kick is amazing.

    4. Broccoli Cheddar Chicken Pasta

    Add 2 cups of frozen broccoli florets during the last 30 minutes of pasta cooking. Replace Parmesan with 1 ½ cups of shredded sharp cheddar cheese. This is a cheddar broccoli chicken pasta that kids love.

    Add 8 oz of sliced mushrooms to the slow cooker during the last hour of cooking the chicken. Use fresh thyme instead of Ranch seasoning. The earthy, savory flavor is elegant.

    6. Lemon Herb Chicken Pasta

    Omit the Ranch seasoning. Add 1 teaspoon of dried oregano, 1 teaspoon of dried basil, and the zest of 1 lemon. At the end, stir in 2 tablespoons of fresh lemon juice. The bright, herby flavor is perfect for spring.

    7. Low‑Carb / Keto Chicken Pasta (No Pasta)

    Replace the pasta with 4 cups of zucchini noodles (zoodles) or hearts of palm pasta. Add them at the very end, just to heat through (2‑3 minutes). This low carb slow cooker chicken is keto‑friendly.

    Use dairy‑free cream cheese (Kite Hill or Violife), dairy‑free Parmesan, and coconut cream instead of heavy cream. The sauce will be slightly thinner but still delicious.

    How to Store, Freeze, and Reheat

    Refrigerator

    Store leftovers in an airtight container for up to 4 days. The pasta will absorb more sauce overnight, so it may be thicker – add a splash of broth or milk when reheating.

    Freezer

    This dish freezes well, but note that the texture of the pasta may soften. Freeze in portions for up to 2 months. Thaw overnight in the refrigerator. Reheat gently on the stovetop or in the microwave, adding a little broth to loosen the sauce.

    Reheating Best Practices

    Stovetop: Reheat over medium‑low heat with a splash of chicken broth or milk, stirring until hot. Microwave: Heat in 60‑second bursts at 70% power, stirring between.

    What to Serve with Creamy Slow Cooker Chicken Pasta

    • Garlic bread or breadsticks – For sopping up the creamy sauce.
    • A simple green salad with lemon vinaigrette – Cuts through the richness.
    • Roasted vegetables (asparagus or broccoli) – Adds color and nutrients.
    • Steamed green beans – Light and fresh.
    • A glass of white wine (Chardonnay or Pinot Grigio) – Perfect pairing.

    Frequently Asked Questions

    Can I use frozen chicken?

    Yes, but it is not recommended for food safety. Frozen chicken takes longer to come to temperature, which can keep it in the “danger zone” too long. Thaw chicken in the refrigerator overnight before using for best results.

    Can I use milk instead of heavy cream?

    You can, but the sauce will be thinner and less rich. For a lighter version, use half‑and‑half or add 1 tablespoon of cornstarch mixed with 2 tablespoons of milk to thicken.

    Why is my sauce grainy or curdled?

    Grainy sauce usually happens when dairy is overheated or added too early. Always add cream and Parmesan at the very end, and do not let the sauce boil after adding them. If your sauce curdles, try whisking vigorously – it may come back together.

    Can I use a different pasta shape?

    Yes. Use any short, sturdy pasta: penne, rotini, fusilli, rigatoni, or farfalle. Avoid thin noodles like angel hair or spaghetti, which can become mushy.

    How many calories are in a serving?

    One serving (about 1.5 cups) contains approximately 550‑680 calories, 32g fat, 48g carbohydrates, and 38g protein. This is a rich, satisfying comfort meal – perfect for indulgent nights.

    Can I add vegetables to the slow cooker?

    Yes. Add mushrooms, bell peppers, or zucchini during the last hour of cooking the chicken. Add spinach or sun‑dried tomatoes at the very end.

    Can I make this in an Instant Pot?

    Yes. Use the sauté function to brown the chicken (optional). Add broth, cream cheese, and seasonings. Pressure cook on HIGH for 10 minutes (for breasts) or 12 minutes (for thighs). Quick release. Remove chicken, shred, then add uncooked pasta and extra broth. Pressure cook on HIGH for 4‑5 minutes. Stir in cream and Parmesan.

    The Magic of Slow Cooker Creamy Pasta

    Slow cooker creamy pasta dishes have become increasingly popular because they solve the biggest problem with traditional creamy pastas: the sauce can break, the pasta can overcook, and you are left with a sink full of pots. By cooking the pasta directly in the sauce, you get a dish where the pasta absorbs all the flavors, and the starch from the pasta helps thicken the sauce naturally. The slow cooker’s gentle heat ensures the dairy does not curdle. It is a brilliant, hands‑off method that delivers restaurant‑quality results every time. This crockpot chicken Alfredo style dish is a testament to that magic.

    Why You Should Make This Creamy Slow Cooker Chicken Pasta This Week

    You probably have chicken in the freezer, broth in the pantry, and cream cheese in the fridge. Pasta is a pantry staple. In under 10 minutes of morning prep, you can have a dinner that tastes like a labor of love. It is perfect for:

    • Busy weeknights when you have zero energy – Set it and forget it.
    • Meal prep for the week – Make a big batch and portion out.
    • Family dinners on cold evenings – Warm, creamy, comforting.
    • Potlucks and gatherings – Transport in the slow cooker.
    • When you need a guaranteed crowd‑pleaser – Everyone loves creamy chicken pasta.

    The first time I made this creamy slow cooker chicken pasta, my family asked for it again the very next week. My kids licked their bowls clean. My husband, who is not usually a pasta fan, went back for seconds. Now it is a staple in our dinner rotation – especially on days when I know I will not have time to cook.

    So layer that chicken, add that cream cheese, and get ready to make the creamiest, easiest, most delicious slow cooker chicken pasta of your life.

    Final Thoughts

    Creamy Slow Cooker Chicken Pasta is proof that you do not need to stand over a stove to create a rich, comforting, restaurant‑quality meal. Tender chicken, a velvety cream sauce, and perfectly cooked pasta – all from one pot, with almost no hands‑on time. Whether you keep the classic recipe or experiment with bacon, spinach, or Cajun spices, this dish will earn a permanent spot in your dinner rotation. This truly is the best slow cooker creamy chicken pasta for busy families.

    So go ahead – make it this week. Scoop it into bowls, sprinkle with Parmesan, and watch the smiles. And enjoy every creamy, comforting, delicious bite.


    Have you made this creamy slow cooker chicken pasta? What’s your favorite add‑in – sun‑dried tomatoes, spinach, or bacon? Share your photos and tips in the comments below. And if this recipe saved your dinner plans, save it for later or send it to a friend who needs an easy, delicious meal.

  • Easy Cannoli Cheesecake – No Water Bath, No Fuss, All the Creamy Italian Flavor

    Easy Cannoli Cheesecake – No Water Bath, No Fuss, All the Creamy Italian Flavor

    There are cheesecakes that require hours of water baths and worry, and then there is this Easy Cannoli Cheesecake – the kind of dessert that brings together two Italian favorites: creamy, ricotta‑rich cannoli filling and silky cheesecake, all in one stunning no‑bake or baked treat. Imagine a buttery graham cracker crust, a velvety smooth filling bursting with vanilla, cinnamon, and mini chocolate chips, and a dusting of powdered sugar that makes it look like it came from a bakery. No water bath, no cracking, no stress. This cheesecake is foolproof, incredibly delicious, and tastes exactly like a cannoli in slice form. If you are searching for a cannoli cheesecake recipe that is easy, authentic, and guaranteed to impress, this is the one.

    Whether you need a showstopping dessert for a holiday, a birthday, a potluck, or just a weekend treat, this cannoli cheesecake delivers. It uses simple ingredients, comes together quickly, and tastes even better the next day. This Italian ricotta cheesecake will become a family favorite.

    In this complete guide, you will learn how to make the perfect easy cannoli cheesecake, including pro tips for a creamy, lump‑free filling, delicious variations (add pistachios, orange zest, or a chocolate ganache topping), storage and freezing instructions, and why skipping the water bath makes this recipe a game‑changer. Let’s preheat that oven.

    Why This Easy Cannoli Cheesecake Is a Game‑Changer

    Traditional cheesecakes can be intimidating – water baths, cracks, long cooling times. This cannoli cheesecake skips the water bath and uses a simple baked method that produces a creamy, dense, crack‑free dessert every time. The filling is a blend of ricotta and cream cheese, giving it the authentic cannoli taste with the smooth texture of cheesecake. Mini chocolate chips, vanilla, and a hint of cinnamon round out the flavors. The graham cracker crust adds a buttery crunch. It is everything you love about a cannoli – in cheesecake form. This is a no water bath cheesecake that anyone can master.

    Here is why you will love it:

    • Only 20 minutes of prep – Then the oven does the work.
    • No water bath required – No leaks, no stress.
    • Incredibly creamy and rich – Tastes like a classic cannoli.
    • Foolproof and crack‑free – Follow the simple steps.
    • Customizable – Add pistachios, orange zest, or chocolate drizzle.
    • Make‑ahead and freezer‑friendly – Perfect for parties.
    • Impresses guests – Looks like it came from an Italian bakery.

    Once you try this easy Italian cheesecake, you will never go back to plain cheesecake again.

    The Complete Easy Cannoli Cheesecake Recipe

    This recipe makes one 9‑inch cheesecake (about 12 servings). It can easily be doubled.

    Ingredients – For the Crust:

    • 1 ½ cups (150g) graham cracker crumbs (about 12 full sheets)
    • ½ cup (113g, 1 stick) unsalted butter, melted
    • 2 tablespoons granulated sugar (optional, for sweetness)

    Ingredients – For the Cannoli Cheesecake Filling:

    • 24 oz (680g) whole milk ricotta cheese, well drained (see pro tips)
    • 16 oz (452g) cream cheese, softened to room temperature
    • 1 ½ cups (180g) powdered sugar
    • 3 large eggs, room temperature
    • 2 teaspoons vanilla extract
    • 1 teaspoon ground cinnamon
    • ¼ teaspoon salt
    • ¾ cup (130g) mini semi‑sweet chocolate chips (plus extra for topping)
    • Optional: 1 tablespoon orange zest (for a citrus note)
    • Optional: ¼ cup chopped pistachios for garnish

    For the Topping (Optional):

    • Powdered sugar for dusting
    • Additional mini chocolate chips
    • Chopped pistachios
    • Melted chocolate drizzle (½ cup chocolate chips + 1 tsp coconut oil)

    Equipment:

    • 9‑inch springform pan
    • Food processor or rolling pin (for crust)
    • Electric mixer (hand or stand)
    • Mixing bowls
    • Rubber spatula
    • Aluminum foil
    • Cooling rack

    Step‑by‑Step Instructions

    Step 1 – Preheat and Prepare the Pan

    Preheat your oven to 325°F (163°C). Grease a 9‑inch springform pan with butter or non‑stick spray. Wrap the outside of the pan with a layer of aluminum foil to prevent any potential leaks (even though this recipe does not use a water bath, the foil is a precaution). Set aside.

    Step 2 – Make the Graham Cracker Crust

    In a medium bowl, combine the graham cracker crumbs, melted butter, and sugar (if using). Stir until the mixture resembles wet sand. Press the crumbs firmly into the bottom and about 1 inch up the sides of the prepared springform pan. Use the bottom of a measuring cup to press down firmly. Bake the crust for 10 minutes, then remove and let cool while you prepare the filling.

    Step 3 – Drain the Ricotta (Very Important!)

    Ricotta cheese contains excess moisture that can make the cheesecake watery. To prevent this, place the ricotta in a fine‑mesh strainer lined with cheesecloth or a paper towel over a bowl. Let it drain in the refrigerator for at least 1 hour, or up to overnight. You can also press gently with a spoon to release more liquid. This step ensures a thick, creamy cheesecake.

    Step 4 – Make the Cannoli Cheesecake Filling

    In a large mixing bowl (or stand mixer with paddle attachment), beat the softened cream cheese and drained ricotta together on medium speed until smooth and creamy, about 2‑3 minutes. Scrape down the sides. Add the powdered sugar, vanilla extract, cinnamon, and salt. Beat until well combined. Add the eggs one at a time, beating on low speed just until incorporated after each addition. Do not overmix – overmixing adds too much air and can cause cracks. Fold in the mini chocolate chips (and orange zest if using) with a rubber spatula.

    Step 5 – Assemble and Bake

    Pour the filling into the cooled crust. Spread evenly with a spatula. Tap the pan gently on the counter to release air bubbles. Place the springform pan on a baking sheet (to catch any drips). Bake at 325°F for 55‑70 minutes, until the edges are set and the center is slightly jiggly (like jelly). The cheesecake will continue to set as it cools. Turn off the oven, crack the door open, and let the cheesecake cool in the oven for 1 hour. This gradual cooling prevents cracks.

    Step 6 – Cool Completely and Chill

    Remove the cheesecake from the oven and run a thin knife around the edge of the pan to loosen it (this prevents cracking as it contracts). Let it cool to room temperature on a wire rack, then cover and refrigerate for at least 4 hours, preferably overnight. Chilling is essential for the perfect texture.

    Step 7 – Top and Serve

    Just before serving, dust the cheesecake with powdered sugar. Sprinkle with additional mini chocolate chips and chopped pistachios. For an extra decadent touch, drizzle with melted chocolate. Release the springform pan sides, slice with a sharp knife (wipe the blade between cuts), and serve chilled. This cannoli style cheesecake is pure bliss.

    Pro Tips for the Perfect Cannoli Cheesecake

    Follow these expert tips for a creamy, crack‑free cheesecake every time:

    • Drain the ricotta thoroughly – Excess moisture is the enemy. Do not skip this step. For best results, drain overnight.
    • Use full‑fat ingredients – Whole milk ricotta and full‑fat cream cheese create the richest, creamiest texture. Low‑fat versions will be watery.
    • Room temperature ingredients – Cold cream cheese and eggs can cause a lumpy batter. Leave them out for 1‑2 hours before starting.
    • Do not overmix the batter – Overmixing incorporates too much air, leading to cracks. Mix just until combined.
    • Cool gradually – Turn off the oven and let the cheesecake cool inside with the door cracked. This prevents sudden temperature changes that cause cracks.
    • Chill overnight – Cheesecake needs time to set. Overnight chilling gives the best flavor and texture.
    • Use a springform pan – Essential for easy removal. Wrap the outside with foil to catch any butter drips from the crust.

    Delicious Variations (Same Easy Method)

    Once you master the classic cannoli cheesecake, try these fun twists. These ricotta cheesecake variations will keep your dessert game strong.

    1. Chocolate Cannoli Cheesecake

    Add ¼ cup of unsweetened cocoa powder to the filling (reduce powdered sugar by 2 tablespoons). Use dark chocolate chips. Top with chocolate ganache.

    2. Pistachio Cannoli Cheesecake

    Add ½ cup of finely chopped pistachios to the filling. Sprinkle crushed pistachios on top. Use a drop of almond extract for extra flavor.

    Add 2 tablespoons of lemon zest and 2 tablespoons of fresh lemon juice to the filling (reduce vanilla to 1 teaspoon). Omit the cinnamon and chocolate chips. Top with lemon curd and powdered sugar.

    4. Orange Chocolate Cannoli Cheesecake

    Add 1 tablespoon of orange zest and ¼ cup of orange juice (reduce other liquids slightly). Use dark chocolate chips. The orange‑chocolate combination is heavenly.

    5. Gluten‑Free Cannoli Cheesecake

    Use gluten‑free graham crackers or almond flour crust. The filling is naturally gluten‑free. This gluten free ricotta cheesecake is perfect for celiacs.

    Skip the eggs. Use 1 cup of heavy cream (whipped to stiff peaks) folded into the ricotta‑cream cheese mixture. Chill in the refrigerator for 6 hours. No oven needed.

    7. Mini Cannoli Cheesecakes (Cupcakes)

    Line a muffin tin with paper liners. Press crust mixture into each liner (about 1 tablespoon). Fill with cheesecake batter. Bake at 325°F for 18‑22 minutes. These are perfect for parties.

    Replace the graham cracker crust with an almond flour crust (1 ½ cups almond flour + ¼ cup melted butter + 2 tbsp sweetener). Use a sugar‑free sweetener (erythritol or monk fruit) instead of powdered sugar. Use sugar‑free chocolate chips.

    How to Store, Freeze, and Make Ahead

    Refrigerator

    Store the cheesecake covered in the refrigerator for up to 5 days. The flavor actually improves after a day or two.

    Freezer (Whole or Slices)

    Wrap the cooled cheesecake tightly in plastic wrap, then aluminum foil. Freeze for up to 2 months. To serve, thaw overnight in the refrigerator. For slices, wrap individually and freeze – grab a slice whenever a craving hits.

    Make Ahead for a Party

    This cheesecake is ideal for making 1‑2 days ahead. Bake, cool, chill, and keep refrigerated. Add toppings just before serving.

    What to Serve with Cannoli Cheesecake

    • A dusting of powdered sugar and cocoa powder – Simple and elegant.
    • Fresh berries (raspberries or strawberries) – The tartness contrasts the sweet cheesecake.
    • Whipped cream and a drizzle of chocolate sauce – Extra indulgence.
    • Espresso or a shot of strong coffee – The perfect Italian pairing.
    • Vin Santo or sweet dessert wine – Authentic Italian touch.
    • Alone – it is a complete dessert on its own.

    Frequently Asked Questions

    Do I have to use ricotta? Can I substitute mascarpone?

    Ricotta is traditional for cannoli. You can substitute mascarpone for an even richer, creamier cheesecake, but it will be less “cannoli” in flavor. For best results, use whole milk ricotta.

    Why is my cheesecake watery or runny?

    Watery cheesecake is usually caused by not draining the ricotta properly. Always drain ricotta for at least 1 hour (preferably overnight). Also, ensure you baked it long enough – the center should be just set.

    How do I get clean, neat slices?

    Use a sharp, thin‑bladed knife. Run it under hot water, wipe dry, then slice. Repeat between cuts. This gives clean, professional slices.

    Can I make this without cream cheese?

    You can use all ricotta (32 oz total) for a lighter, more authentic cannoli‑like texture. The cheesecake will be less dense. This is sometimes called a “ricotta pie.”

    How many calories are in a slice?

    One slice (1/12 of the cheesecake) contains approximately 450‑550 calories, 32g fat, 38g carbohydrates, and 14g protein. This is a rich, indulgent Italian dessert – perfect for special occasions.

    Can I add cannoli shells to the topping?

    Yes! Crush a few mini cannoli shells and sprinkle them over the top along with chocolate chips and pistachios. It adds wonderful crunch.

    The Story Behind Cannoli Cheesecake

    Cannoli are a quintessential Sicilian dessert – crispy fried pastry shells filled with sweetened ricotta, often studded with chocolate chips. This cannoli cheesecake transforms that beloved flavor into a silky, no‑stress baked cheesecake. The recipe honors the traditional cannoli filling while eliminating the need to make or buy shells. It has become a popular fusion dessert in Italian‑American bakeries and home kitchens, especially for holidays like Easter and Christmas. This Italian dessert cheesecake is a tribute to that delicious heritage.

    Why You Should Make This Easy Cannoli Cheesecake This Week

    You probably have ricotta and cream cheese in the fridge, graham crackers in the pantry, and chocolate chips in the freezer. In about 20 minutes of prep, you can create a dessert that will have everyone asking for the recipe. It is perfect for:

    • Easter or Christmas dessert table – Traditional Italian flavors.
    • Birthday celebrations – A unique alternative to plain cheesecake.
    • Potlucks and family gatherings – Travels well and serves many.
    • Weekend baking projects – Fun and rewarding.
    • When you need a showstopper without stress – Easy and impressive.

    The first time I made this cannoli cheesecake, I brought it to a family gathering. My Italian aunt, who is very particular about cannoli, took one bite and said, “This tastes like home.” That was the highest compliment. Now it is my most requested dessert for every holiday.

    So drain that ricotta, press that crust, and get ready to bake the creamiest, most delicious easy cannoli cheesecake of your life.

    Final Thoughts

    Easy Cannoli Cheesecake is proof that you do not need a water bath or complicated techniques to create a stunning, creamy, authentic Italian dessert. The combination of ricotta, cream cheese, chocolate chips, and cinnamon delivers all the flavors of a classic cannoli in a simple, foolproof cheesecake. Whether you keep the classic recipe or experiment with pistachios, lemon, or chocolate, this cheesecake will earn a permanent spot in your dessert rotation. This truly is the best cannoli cheesecake recipe for home bakers.

    So go ahead – make it this weekend. Slice it, serve it, and watch it disappear. And enjoy every creamy, chocolate‑studded, cannoli‑flavored bite.


    Have you made this easy cannoli cheesecake? What’s your favorite twist – pistachios, orange zest, or a chocolate ganache topping? Share your photos and tips in the comments below. And if this recipe became a family tradition, save it for later or send it to a friend who loves Italian desserts.

  • Kentucky Crockpot Potatoes – The Creamy, Cheesy, No-Fuss Side Dish That Steals the Show

    Kentucky Crockpot Potatoes – The Creamy, Cheesy, No-Fuss Side Dish That Steals the Show

    There are side dishes that are an afterthought, and then there are Kentucky Crockpot Potatoes – the kind of creamy, cheesy, soul‑satisfying casserole that people ask for by name. Imagine tender, melt‑in‑your‑mouth potatoes, swirled in a rich, velvety sauce made with sour cream, cream of potato soup, and a generous blanket of melted cheddar. The slow cooker does all the work, transforming simple ingredients into a dish that is perfect for holiday tables, potlucks, Sunday suppers, and busy weeknights. If you are searching for a creamy slow cooker potato side dish that is impossible to resist, this is the one.

    Whether you use a bag of frozen O’Brien potatoes for a shortcut or slice fresh Yukon Golds, this recipe is forgiving, affordable, and always a crowd‑pleaser. This Southern cheesy potato casserole will become a staple in your kitchen.

    In this complete guide, you will learn the authentic recipe for Kentucky crockpot potatoes, including pro tips for the perfect creamy texture, delicious variations (add bacon, swap cheeses, or make it spicy), storage and freezing instructions, and why this dish has been a Kentucky favorite for generations. Let’s dust off that crockpot.

    What Makes Kentucky Crockpot Potatoes So Special?

    At first glance, crockpot potatoes may sound like any other slow‑cooked side dish. What sets the Kentucky version apart is its balance of richness and simplicity. The potatoes absorb the flavors slowly, creating a soft, almost creamy texture without turning mushy. The combination of sour cream, cream soup, and cheese melts into a luxurious sauce that coats every bite. It is the kind of dish that shows up at family reunions, church suppers, and holiday tables – and not a single scoop ever makes it back home. This is the ultimate comfort food side dish that pairs beautifully with fried chicken, meatloaf, ham, or barbecue.

    Here is why you will love it:

    Only 10 minutes of prep – Then the crockpot does the work.

    Incredibly creamy and cheesy – The perfect consistency.

    Budget‑friendly – Potatoes, soup, and cheese are inexpensive staples.

    Great for potlucks and holidays – Stays warm for hours in the crockpot.

    Customizable – Add bacon, ham, green onions, or different cheeses.

    Kid‑friendly and adult‑loved – Everyone goes back for seconds.

    No boiling, no draining, no mess – Everything cooks right in the slow cooker.

    Once you try these slow cooker cheesy potatoes, you will understand why they have been a Southern secret for decades.

    The Complete Kentucky Crockpot Potatoes Recipe

    This recipe serves 8‑10 people. It fits a 4‑6 quart slow cooker and can easily be doubled.

    Ingredients:

    2 bags (26 oz each) frozen O’Brien potatoes with onions and peppers – or 2 lbs of fresh Yukon Gold or Russet potatoes, peeled and diced into 1‑inch cubes

    1 can (10.5 oz) cream of potato soup – Campbell’s or any brand; cream of chicken or cream of mushroom also work

    8 oz (1 cup) sour cream – full‑fat for best creaminess

    2 teaspoons garlic powder

    2 teaspoons black pepper

    2 teaspoons salt – adjust to taste, as soup and cheese add salt

    1½ cups shredded sharp cheddar cheese – divided

    Optional add‑ins: ½ cup cooked bacon bits, 1 cup diced ham, 2 tablespoons chopped fresh chives

    Equipment:

    • 4‑6 quart slow cooker
    • Large mixing bowl
    • Rubber spatula or large spoon

    Step‑by‑Step Instructions

    Step 1 – Prepare the Slow Cooker

    Lightly grease the inside of your crockpot with non‑stick spray or rub with a little butter. This prevents sticking and makes cleanup easier.

    Step 2 – Mix the Ingredients

    In a large bowl, combine the frozen O’Brien potatoes, cream of potato soup, sour cream, garlic powder, black pepper, and salt. Stir until everything is evenly coated. The mixture will be thick and creamy.

    Step 3 – Transfer to the Crockpot

    Spoon the potato mixture into the prepared slow cooker and spread it evenly. For a more layered approach, you can alternate layers of potatoes, sauce, and cheese – but the simplest method is to mix everything together first, which works beautifully.

    Step 4 – Cook on High or Low

    Cover and cook on HIGH for 2‑3 hours or LOW for 4‑5 hours. The potatoes are ready when they are tender and easily pierced with a fork. Stir once or twice during cooking if possible to ensure even heat distribution. Avoid lifting the lid too often, as heat loss can extend cooking time.

    Step 5 – Add the Cheese

    Stir in half of the shredded cheddar cheese, then sprinkle the remaining cheese evenly over the top. Cover and cook for an additional 20‑30 minutes, until the cheese is fully melted and bubbly.

    Step 6 – Serve Warm

    Garnish with chopped fresh chives or parsley if desired. Serve directly from the crockpot set to “warm.” These cheesy crockpot potatoes are irresistible.

    Pro Tips for the Best Kentucky Crockpot Potatoes

    Follow these expert tips for perfect Southern slow cooker potatoes every time:

    Use frozen O’Brien potatoes for the ultimate shortcut – They come with onions and peppers already mixed in, saving you chopping time. If using fresh potatoes, choose Yukon Gold for creamy texture or Russets for a fluffier bite. Avoid waxy potatoes, which tend to stay firm and don’t absorb flavors as well.

    Do not thaw frozen potatoes – Add them straight from the freezer to the slow cooker. They will cook perfectly.

    Adjust liquid for consistency – If the potatoes seem dry toward the end of cooking, stir in a splash of milk or extra sour cream. For a thicker consistency, cook uncovered for the last 10‑15 minutes to evaporate excess moisture.

    Add cheese at the end – Adding cheese too early can cause it to become grainy or separate. Stirring half in and sprinkling the rest on top during the last 30 minutes ensures a smooth, gooey finish.

    Use freshly shredded cheese – Pre‑shredded cheese contains anti‑caking agents that can prevent it from melting smoothly.

    Make it ahead for parties – Assemble all ingredients in the slow cooker insert the night before, cover, and refrigerate. In the morning, place the insert in the crockpot base and cook as directed.

    Delicious Variations (Same Crockpot Method)

    Once you master the classic Kentucky crockpot potatoes, try these fun twists. These slow cooker potato variations will keep your side dish game strong.

    1. Loaded Kentucky Potatoes (Bacon & Chives)

    Add ½ cup of cooked, crumbled bacon and ¼ cup of fresh chopped chives to the mixture before cooking. Top with an extra sprinkle of bacon and chives before serving. This version tastes like a loaded baked potato.

    2. Spicy Kentucky Potatoes

    Add 1 teaspoon of cayenne pepper or 2 teaspoons of smoked paprika to the seasoning blend. For extra heat, use pepper jack cheese instead of cheddar and add a diced jalapeño.

    3. Ham and Cheddar Kentucky Potatoes

    Add 1 cup of diced cooked ham to the mixture. Use sharp cheddar cheese. This turns the side dish into a hearty main course.

    4. Cream Cheese Kentucky Potatoes

    Add 4 oz of softened cream cheese to the sauce mixture. The cream cheese adds an extra layer of richness and tang. This version is sometimes called “crack potatoes” because of its addictive quality.

    Replace the garlic powder with 1 packet of dry ranch seasoning mix. The herby, tangy ranch flavor is a crowd‑pleaser.

    6. Vegetarian Kentucky Potatoes

    Use cream of mushroom soup instead of cream of potato. Omit any meat add‑ins. The mushrooms add umami depth.

    7. Low‑Carb / Keto Kentucky Potatoes

    This dish is naturally high in carbohydrates due to the potatoes. For a low‑carb version, substitute the potatoes with 4 cups of cauliflower florets. Adjust cooking time to 2‑3 hours on HIGH (cauliflower cooks faster than potatoes).

    For a crunchy topping, crush 2 cups of cornflakes and mix with ¼ cup of melted butter. Sprinkle over the cheese during the last 15 minutes of cooking. This adds a delightful crunch that contrasts with the creamy potatoes.

    How to Store, Freeze, and Make Ahead

    Refrigerator

    Store leftovers in an airtight container for up to 4 days. Reheat in the microwave or in a 350°F oven covered with foil until warmed through. Add a splash of milk if the potatoes seem dry.

    Freezer

    This dish freezes well. Cool completely, then transfer to a freezer‑safe container. Freeze for up to 2 months. Thaw overnight in the refrigerator, then reheat in the slow cooker on LOW for 1‑2 hours or in a covered baking dish at 350°F for 20‑25 minutes.

    Make Ahead for a Party

    Assemble the potatoes (without the cheese topping) in the slow cooker insert. Cover and refrigerate for up to 24 hours. When ready to cook, place the insert in the crockpot base and cook as directed. Add the cheese during the last 30 minutes of cooking.

    What to Serve with Kentucky Crockpot Potatoes

    Fried chicken – The classic Kentucky pairing.

    Meatloaf or meatballs – Hearty and comforting.

    Ham or pork chops – A traditional Southern combination.

    BBQ ribs or pulled pork – The creamy potatoes balance the smoky sweetness.

    Roasted turkey or chicken – Perfect for holiday dinners.

    Steamed green beans or a crisp salad – Adds a fresh contrast.

    Frequently Asked Questions

    What are O’Brien potatoes?

    O’Brien potatoes are diced or shredded potatoes mixed with diced red and green bell peppers and onions. They are sold frozen in the potato aisle and are a convenient shortcut for this recipe. If you cannot find them, use plain frozen hash browns and add ½ cup of diced onion and ½ cup of diced bell peppers.

    Can I make this with fresh potatoes?

    Absolutely. Use 2 pounds of Yukon Gold or Russet potatoes. Peel them (or leave the skin on for a rustic texture) and dice into ½‑inch cubes. Fresh potatoes will take slightly longer to cook – aim for 4‑5 hours on LOW. You may want to add an extra ¼ cup of broth or water to ensure they cook through.

    Can I use a different cream soup?

    Yes. Cream of chicken soup, cream of mushroom soup, or even cheddar cheese soup work beautifully. Each will give a slightly different flavor profile – cream of mushroom adds earthy depth, cream of chicken is milder and more neutral.

    Why are my potatoes still hard?

    If the potatoes are still hard, they need more time. Cooking times vary depending on the size of your potato pieces, the type of potatoes, and your slow cooker. Cover and cook for an additional 30‑60 minutes on HIGH. Next time, cut the potatoes into smaller, uniform pieces.

    How many calories are in a serving of Kentucky crockpot potatoes?

    One serving (about 1 cup) contains approximately 320‑420 calories, 20g fat, 30g carbohydrates, and 12g protein. This is a rich, indulgent side dish – perfect for special occasions.

    Can I make this in an Instant Pot?

    Yes. Use the slow cook function (2‑3 hours on HIGH) or pressure cook on HIGH for 8 minutes with a quick release. The texture will be slightly different but still delicious.

    The Kentucky Tradition of Slow‑Cooked Comfort

    Kentucky cooking is known for its hearty, no‑nonsense approach to comfort food. From bourbon balls to burgoo, the Bluegrass State has a rich culinary heritage. Kentucky crockpot potatoes embody this spirit: humble ingredients, slow cooking, and a result that is deeply satisfying. The dish is often served alongside fried chicken, country ham, or barbecue – meals that bring families together around the table. This recipe is a tribute to that tradition, adapted for modern cooks who need a hands‑off, reliable side dish.

    Why You Should Make These Kentucky Crockpot Potatoes This Week

    You probably have a bag of frozen potatoes in your freezer, a can of soup in the pantry, and sour cream and cheese in the fridge. In about 10 minutes of prep, you can create a side dish that tastes like you spent all day in the kitchen. They are perfect for:

    Thanksgiving, Christmas, or Easter dinner – Frees up oven space.

    Potlucks and church suppers – Transport in the crockpot.

    Busy weeknights – Set it and forget it.

    Family gatherings and barbecues – Always a hit.

    Meal prep for the week – Reheat and serve alongside anything.

    The first time I made Kentucky crockpot potatoes, I brought them to a family cookout. The crockpot was empty within 30 minutes, and my mother‑in‑law asked for the recipe before I had even finished eating. Now I make them for every holiday, and there are never leftovers.

    So mix those frozen potatoes, stir up that creamy sauce, and get ready to make the most comforting, cheesy, irresistible Kentucky crockpot potatoes of your life.

    Final Thoughts

    Kentucky Crockpot Potatoes prove that you do not need complicated techniques or expensive ingredients to create a memorable side dish. Creamy potatoes, tangy sour cream, savory soup, and plenty of melted cheese come together in a slow cooker masterpiece that will have everyone reaching for seconds. Whether you keep the classic version or add bacon, ranch seasoning, or a crunchy topping, these potatoes will earn a permanent spot on your table. This truly is the best creamy cheesy potato casserole for any occasion.

    So go ahead – make them this weekend. Serve them alongside fried chicken or meatloaf. Watch them disappear. And enjoy every creamy, cheesy, comforting bite.


    Have you made Kentucky crockpot potatoes? What’s your favorite twist – bacon, ranch, or a crunchy cornflake topping? Share your photos and tips in the comments below. And if this recipe became a family favorite, save it for later or send it to a friend who loves easy, delicious side dishes.

  • Crockpot Grape Jelly Meatballs – The 3‑Ingredient Party Appetizer That Disappears First

    Crockpot Grape Jelly Meatballs – The 3‑Ingredient Party Appetizer That Disappears First

    There are appetizers that require hours of preparation, and then there are Crockpot Grape Jelly Meatballs – the kind of sweet, tangy, savory bite that people hover around, toothpick in hand, waiting for the slow cooker lid to open. These meatballs have been a party legend for decades, and for good reason. With just three simple ingredients – frozen meatballs, grape jelly, and chili sauce – you can create a sticky, glazed, irresistible appetizer that tastes like you spent all day in the kitchen. The slow cooker does all the work, transforming basic pantry staples into a sauce that is sweet, tangy, slightly spicy, and completely addictive. If you are searching for a crockpot grape jelly meatballs recipe that will make you the hero of every game day, potluck, or holiday gathering, this is the one.

    Whether you need a last‑minute appetizer for a Super Bowl party, a make‑ahead dish for Christmas dinner, or simply a weeknight snack that feels like a treat, these meatballs deliver. They are naturally gluten‑free (check your chili sauce), budget‑friendly, and endlessly customizable. This 3 ingredient slow cooker meatballs recipe will become your secret weapon for entertaining.

    In this complete guide, you will learn the master recipe for crockpot grape jelly meatballs, including pro tips for the perfect sticky glaze, delicious variations (add sriracha, pineapple, or barbecue sauce), storage and freezing instructions, and why this retro appetizer has stood the test of time. Let’s dust off that crockpot.

    Why Grape Jelly Meatballs Are a Party Legend

    The combination of grape jelly and chili sauce may sound unusual, but it is a match made in appetizer heaven. The grape jelly provides sweetness and body, while the chili sauce (not to be confused with hot sauce – it is a tomato‑based condiment) adds tanginess and a gentle kick. Together, they create a glossy, sticky glaze that coats every meatball perfectly. The slow cooker melds the flavors over several hours, turning frozen meatballs into tender, saucy bites of perfection. This retro recipe has been a staple at baby showers, wedding receptions, and football parties since the 1960s, and it is not going anywhere. This is a vintage cocktail meatball recipe that never fails.

    Here is why you will love it:

    Only 10 minutes of prep – Then the crockpot takes over.

    3 simple ingredients – Meatballs, grape jelly, chili sauce.

    Incredibly addictive sweet‑tangy flavor – Everyone asks for the recipe.

    Perfect for parties, game days, and holidays – Always the first dish to empty.

    Customizable – Add sriracha, BBQ sauce, or pineapple.

    Make‑ahead and freezer‑friendly – Double batch and save half.

    Kid‑friendly and adult‑approved – A crowd‑pleaser across generations.

    Once you try these easy grape jelly meatballs, you will understand why they have been a party staple for over 50 years.

    The Complete Crockpot Grape Jelly Meatballs Recipe

    This recipe serves 12‑15 as an appetizer. It fits a 4‑6 quart slow cooker and can easily be doubled for a larger crockpot.

    The 3 Main Ingredients:

    2 lbs (about 32-40) frozen cocktail meatballs (homemade or store‑bought, beef, turkey, or plant‑based)

    1 cup (320g) grape jelly (regular or low‑sugar)

    1 cup (240ml) chili sauce (Heinz or similar – found near ketchup and cocktail sauce)

    Optional Add‑Ins (Not Counted in the 3):

    1 tablespoon sriracha or hot sauce – for heat

    1 tablespoon Worcestershire sauce – for umami depth

    1 teaspoon garlic powder or minced fresh garlic

    ½ cup pineapple chunks – for sweet/tangy twist

    ¼ cup BBQ sauce – for smokiness

    Fresh parsley or green onions for garnish

    Equipment:

    • 4‑6 quart slow cooker
    • Small mixing bowl
    • Whisk
    • Tongs or large spoon

    Step‑by‑Step Instructions

    Step 1 – Prepare the Sauce

    In a small bowl, whisk together the grape jelly and chili sauce until smooth. The jelly may be thick, but it will melt as it heats. If using any optional add‑ins (sriracha, Worcestershire, garlic), whisk them in now.

    Step 2 – Add Meatballs to the Slow Cooker

    Place the frozen meatballs directly into the slow cooker. You do not need to thaw them first. Pour the sauce mixture over the meatballs and stir gently to coat every meatball.

    Step 3 – Slow Cook

    Cover and cook on LOW for 4‑5 hours or on HIGH for 2‑3 hours. Stir once or twice during cooking to redistribute the sauce. The meatballs are ready when they are heated through, tender, and the sauce is glossy and thick.

    Step 4 – Keep Warm and Serve

    Switch the slow cooker to the “warm” setting to keep the meatballs at the perfect serving temperature. Serve directly from the crockpot with toothpicks or small forks. Garnish with chopped parsley or green onions if desired.

    Pro Tips for the Best Grape Jelly Meatballs

    Follow these expert tips for perfect slow cooker meatballs every time:

    Use frozen meatballs for convenience – Homemade meatballs work, too, but frozen are perfectly sized and hold up well during long cooking. If using homemade, brown them briefly in a skillet first to seal in flavor.

    Do not skip stirring – Stirring once or twice prevents the meatballs from sticking together and ensures even coating.

    Adjust sweetness to taste – If you prefer a less sweet sauce, reduce grape jelly to ¾ cup and add an extra ¼ cup of chili sauce.

    Add heat gradually – Start with 1 teaspoon of sriracha and taste before adding more. The chili sauce already has a mild tangy kick.

    Use a liner for easy cleanup – Slow cooker liners make cleanup effortless. The sticky jelly sauce can be stubborn.

    Scale up for large parties – A 6‑quart slow cooker can hold up to 4 lbs of meatballs. Double the sauce proportionally.

    Do not overcook – Frozen meatballs are already cooked. You are just heating them and infusing flavor. Overcooking can make them mushy.

    Delicious Variations (Same 3‑Ingredient Base)

    Once you master the classic grape jelly meatballs, try these fun twists. These crockpot meatball variations will keep your appetizer game strong.

    1. Spicy Grape Jelly Meatballs (Sweet & Hot)

    Add 2 tablespoons of sriracha or 1 teaspoon of red pepper flakes to the sauce. For extra heat, use hot chili sauce instead of regular. The sweet‑spicy combination is addictive.

    2. BBQ Grape Jelly Meatballs

    Replace half of the chili sauce with your favorite BBQ sauce (¼ cup chili sauce + ¼ cup BBQ sauce). The smokiness adds a new dimension. Use a sweet or hickory BBQ sauce.

    3. Pineapple Grape Jelly Meatballs

    Add 1 cup of drained pineapple chunks during the last hour of cooking. The pineapple adds tropical sweetness and a pop of color. Use crushed pineapple for a saucier texture.

    4. Cranberry Jelly Meatballs (Thanksgiving Twist)

    Replace grape jelly with whole berry cranberry sauce. The tartness pairs beautifully with the chili sauce. This is a fantastic holiday appetizer.

    5. Apricot Jalapeño Meatballs

    Replace grape jelly with apricot preserves. Add 2 tablespoons of pickled jalapeño brine and ¼ cup of chopped jalapeños. The sweet‑spicy‑fruity combination is a winner.

    6. Orange Marmalade Meatballs

    Use orange marmalade instead of grape jelly. Add 1 teaspoon of ground ginger and 1 tablespoon of soy sauce. This has an Asian‑inspired flavor profile.

    7. Turkey or Plant‑Based Meatballs

    This recipe works beautifully with turkey meatballs, plant‑based meatballs (like Gardein or Impossible), or even homemade chicken meatballs. Adjust cooking time slightly (plant‑based may cook faster).

    8. Grape Jelly Meatballs with Cream Cheese (Crack Meatballs)

    Add 4 oz of cream cheese (cubed) during the last 30 minutes of cooking. Stir until melted. The cream cheese creates an ultra‑creamy, rich sauce – sometimes called “crack meatballs.”

    How to Store, Freeze, and Make Ahead

    Refrigerator

    Store leftover meatballs in an airtight container for up to 5 days. Reheat in the microwave, on the stovetop, or in the slow cooker (LOW for 1‑2 hours).

    Freezer (Cooked)

    Cool the meatballs completely, then transfer to a freezer‑safe container or bag. Freeze for up to 3 months. Thaw overnight in the refrigerator, then reheat in the slow cooker on LOW for 1‑2 hours or microwave until hot.

    Freezer (Uncooked Sauce)

    You can freeze the sauce mixture separately for up to 6 months. Combine frozen meatballs and frozen sauce in the slow cooker and cook as directed (add 1 hour to cooking time).

    Make Ahead for a Party

    Assemble the meatballs and sauce in the slow cooker insert, cover, and refrigerate overnight. In the morning, place the insert in the slow cooker base and cook as directed. This makes party prep effortless.

    What to Serve with Grape Jelly Meatballs

    Toothpicks or small forks – Essential for serving.

    Side of crusty bread or dinner rolls – To soak up extra sauce.

    Steamed rice or rice pilaf – Turn them into a main course.

    Buttered egg noodles – Another great main dish option.

    Coleslaw or a crisp green salad – For contrast.

    A cold beer or glass of red wine – The perfect beverage pairing.

    Frequently Asked Questions

    What is chili sauce? Is it the same as hot sauce?

    No. Chili sauce (like Heinz Chili Sauce) is a tomato‑based condiment similar to ketchup but spicier and tangier, with chunks of peppers and onions. It is found near ketchup and cocktail sauce. Do not substitute with Thai sweet chili sauce (too thin) or hot sauce (too hot) – though you can add hot sauce for extra heat.

    Can I use homemade meatballs?

    Absolutely. Use your favorite meatball recipe (beef, pork, turkey, or a blend). Brown them in a skillet before adding to the slow cooker to develop flavor and help them hold their shape. Cook as directed.

    Can I use a different jelly?

    Yes. Apricot, orange marmalade, blackberry, or even apple jelly work well. Cranberry sauce is also a great substitute (use whole berry or jellied). Each will give a slightly different flavor profile.

    Why are my meatballs mushy?

    Mushy meatballs usually result from overcooking or using low‑quality frozen meatballs that contain a lot of filler. Cook just until heated through (2‑3 hours on HIGH, 4‑5 on LOW). If using homemade, do not overmix the meat – that can also cause mushiness.

    Can I make these in an Instant Pot?

    Yes. Use the sauté function to brown the meatballs if desired. Add the sauce, then pressure cook on HIGH for 5 minutes. Quick release. The sauce will be thinner; you can thicken with a cornstarch slurry (1 tbsp cornstarch + 2 tbsp water) on sauté mode.

    How many calories are in a grape jelly meatball?

    One meatball (using standard frozen beef meatballs) contains approximately 80‑110 calories, 4‑6g fat, 8‑10g carbohydrates, and 4‑5g protein. This is a guilty pleasure appetizer – perfect for parties.

    Can I add vegetables to the slow cooker?

    Yes. Bell pepper chunks, onion wedges, or pineapple pieces can be added during the last hour of cooking. They will absorb the sauce and become delicious.

    The Retro Appeal of Grape Jelly Meatballs

    Grape jelly meatballs first appeared in American kitchens in the 1960s, a decade known for creative casseroles and “shortcut” recipes using processed ingredients. The combination of grape jelly and chili sauce was popularized by cookbooks and magazine ads for cocktail meatballs. The recipe became a staple at baby showers, wedding receptions, and holiday open houses. Its enduring popularity is a testament to its genius: the sweet and tangy glaze is universally appealing, the slow cooker makes it effortless, and the meatballs are the perfect finger food. This vintage appetizer recipe is here to stay.

    Why You Should Make These Crockpot Grape Jelly Meatballs for Your Next Gathering

    You probably have a jar of grape jelly in your fridge and a bottle of chili sauce in your pantry. Frozen meatballs are a freezer staple. In under 5 minutes of prep, you can create an appetizer that will have guests hovering around the crockpot. They are perfect for:

    • Super Bowl or game day parties – Serve with toothpicks and plenty of napkins.
    • Christmas open houses or holiday buffets – A warm, festive bite.
    • Potlucks and family reunions – Transport in the crockpot, plug in, and serve.
    • Wedding or baby shower appetizer tables – Always a hit.
    • Weeknight dinners when you need something easy – Serve over rice for a quick main dish.

    The first time I made crockpot grape jelly meatballs, I was skeptical. Grape jelly on meatballs? But one bite, and I was converted. The sweet, tangy, savory glaze is pure magic. My family now requests them for every party, and they never last more than 20 minutes. Even my picky teenager asks for them.

    So dump those meatballs into the crockpot, whisk that jelly and chili sauce, and get ready to make the most addictive, crowd‑pleasing appetizer of your life.

    Final Thoughts

    Crockpot Grape Jelly Meatballs prove that the best party food is often the simplest. Three ingredients, five minutes of prep, and a few hours in the slow cooker yield a sweet, tangy, savory appetizer that will have everyone asking for the recipe. Whether you keep the classic version or experiment with sriracha, pineapple, or cranberry sauce, these meatballs will earn a permanent spot on your party menu. This truly is the best easy slow cooker meatball recipe for any occasion.

    So go ahead – make them this weekend. Set out a bowl of toothpicks. Watch them disappear. And enjoy every sweet, sticky, perfectly glazed bite.


    Have you made crockpot grape jelly meatballs? What’s your favorite twist – spicy, BBQ, or pineapple? Share your photos and tips in the comments below. And if this recipe saved your party appetizer game, save it for later or send it to a friend who loves easy, delicious crowd‑pleasers.

  • Butter Swirl Biscuits – Flaky, Buttery, and Swirled to Perfection

    Butter Swirl Biscuits – Flaky, Buttery, and Swirled to Perfection

    There are biscuits that are good, and then there are Butter Swirl Biscuits – the kind that make you close your eyes after the first bite and say “oh my.” Imagine a tall, tender, golden biscuit with visible ribbons of butter running through every layer. Each swirl is a pocket of rich, savory flavor that melts on your tongue. These are not your everyday drop biscuits. These are the biscuits you serve when you want to impress – a Sunday morning brunch, a holiday dinner, or just because you deserve something extraordinary. The technique is simple: you roll out the dough, spread softened butter over the surface, then fold and roll to create those signature swirls. The result is a biscuit that is flaky, buttery, and absolutely unforgettable. If you are searching for a butter swirl biscuits recipe that will earn you rave reviews, this is the one.

    Whether you need a showstopping side for fried chicken, a base for breakfast sandwiches, or simply a warm biscuit to slather with jam, these butter swirl biscuits deliver. They are made from scratch with simple ingredients, come together in under an hour, and freeze beautifully. This homemade flaky butter biscuits recipe will become a family tradition.

    In this complete guide, you will learn the master recipe for butter swirl biscuits, including pro tips for achieving those perfect buttery layers, delicious variations (add cheese, herbs, or garlic), storage and freezing instructions, and why the swirl technique transforms ordinary biscuits into something extraordinary. Let’s preheat that oven.

    Why Butter Swirl Biscuits Are a Cut Above

    Traditional biscuits are made by cutting cold butter into flour, creating pockets of fat that melt during baking and leave behind flaky layers. Butter swirl biscuits take this a step further. After the initial dough is made, you roll it out, spread softened butter over the surface, then fold and roll again. This creates distinct, visible swirls of butter that run through the biscuit. The result is an even flakier, more tender, and more flavorful biscuit. The butter melts into the dough as it bakes, creating steam that pushes the layers apart. This is the same technique used in laminating dough for croissants – simplified for biscuits. This is a layered butter biscuit recipe that delivers bakery‑quality results at home.

    Here is why you will love it:

    • Incredibly flaky and tender – Visible layers like a croissant.
    • Rich, buttery flavor in every bite – The swirl technique maximizes butter distribution.
    • Simple ingredients – Flour, butter, buttermilk, baking powder, salt, sugar.
    • No special equipment – Just a rolling pin and a biscuit cutter.
    • Freezer‑friendly – Make ahead and bake fresh.
    • Customizable – Add cheese, herbs, or garlic.
    • Perfect for breakfast, dinner, or any meal – Biscuits are always welcome.

    Once you try these homemade swirl biscuits, you will never go back to plain drop biscuits.

    The Complete Butter Swirl Biscuits Recipe

    This recipe makes 8‑10 large biscuits (using a 3‑inch cutter). It can easily be doubled.

    Ingredients – For the Biscuit Dough:

    • 2 ½ cups (300g) all‑purpose flour (plus more for dusting)
    • 1 tablespoon baking powder
    • 1 teaspoon salt
    • 1 tablespoon granulated sugar (optional, for a touch of sweetness)
    • ½ cup (113g, 1 stick) very cold unsalted butter, cut into small cubes (for the initial dough)
    • 1 cup (240ml) cold buttermilk (plus 2 tablespoons for brushing)

    Ingredients – For the Butter Swirl:

    • 4 tablespoons (56g) unsalted butter, softened to room temperature (not melted)

    Equipment:

    • Large mixing bowl
    • Pastry blender or two forks
    • Rolling pin
    • 3‑inch biscuit cutter (or a drinking glass)
    • Baking sheet
    • Parchment paper
    • Pastry brush

    Step‑by‑Step Instructions

    Step 1 – Preheat and Prepare

    Preheat your oven to 425°F (220°C). Line a baking sheet with parchment paper.

    Step 2 – Make the Base Dough

    In a large bowl, whisk together the flour, baking powder, salt, and sugar. Add the cold butter cubes. Using a pastry blender or two forks, cut the butter into the flour until the mixture resembles coarse crumbs with pea‑sized pieces of butter. The butter should be very cold – you want solid pieces that will create flaky layers.

    Step 3 – Add the Buttermilk

    Pour the cold buttermilk into the flour mixture. Stir with a fork until the dough just comes together. It will be shaggy and sticky. Do not overmix.

    Step 4 – Roll and Fold (The Swirl Technique)

    Turn the dough out onto a well‑floured surface. Pat it into a rough rectangle about ½‑inch thick. Using a rolling pin, roll the dough into a rectangle about 10×14 inches and ¼‑inch thick. Spread the softened 4 tablespoons of butter evenly over the surface of the dough, leaving a ½‑inch border on one long edge. Starting from the opposite long edge, roll the dough tightly into a log (like a cinnamon roll).

    Step 5 – Cut and Shape

    Using a sharp knife, cut the log into 1‑inch thick slices. You should get 8‑10 slices. Place each slice cut‑side down on the floured surface and gently press down to flatten slightly, creating a ¾‑inch thick round. Do not twist the cutter – press straight down. (If you have leftover dough ends, gently reform them into a biscuit shape – they may not be as layered but will still taste great.)

    Step 6 – Arrange and Brush

    Place the biscuits on the prepared baking sheet, spacing them about 2 inches apart. Brush the tops with a little buttermilk or melted butter for a golden crust.

    Step 7 – Bake

    Bake for 12‑15 minutes, until the biscuits are golden brown on top and have risen tall. Rotate the baking sheet halfway through for even browning.

    Step 8 – Serve

    Let the biscuits cool on the baking sheet for 5 minutes, then transfer to a wire rack. Serve warm with butter, jam, honey, or gravy.

    Pro Tips for the Perfect Butter Swirl Biscuits

    Follow these expert tips for perfect layered butter biscuits every time:

    • Keep everything cold – Cold butter and cold buttermilk are essential for flaky layers. If your kitchen is warm, chill the dough for 10 minutes before rolling.
    • Do not overwork the dough – Overmixing develops gluten, which makes tough biscuits. Mix just until the dough comes together.
    • Use a sharp cutter and do not twist – Twisting seals the edges and prevents the biscuits from rising fully. Press straight down and pull up.
    • Roll the dough evenly – A uniform rectangle ensures even swirls and consistent baking.
    • Use softened (not melted) butter for the swirl – Melted butter will soak into the dough and disappear. Softened butter stays in distinct layers.
    • Bake at a high temperature – 425°F creates steam that pushes the layers apart, giving you tall, flaky biscuits.
    • Freeze unbaked biscuits for later – Place shaped biscuits on a baking sheet and freeze until solid, then transfer to a bag. Bake from frozen, adding 2‑3 minutes to the baking time.

    Delicious Variations (Same Swirl Method)

    Once you master the classic butter swirl biscuits, try these fun twists. These biscuit variations will keep your breakfast game strong.

    1. Cheddar and Chive Butter Swirl Biscuits

    Sprinkle ¾ cup of finely shredded sharp cheddar cheese and 2 tablespoons of fresh chopped chives over the butter before rolling. The cheese melts into golden pockets. This is a cheese swirl biscuit perfect for savory meals.

    2. Garlic Herb Butter Swirl Biscuits

    Mix 2 cloves of minced garlic and 1 tablespoon of fresh chopped parsley into the softened butter before spreading. The garlic butter creates savory, aromatic swirls. Serve with pasta or soup.

    3. Cinnamon Sugar Swirl Biscuits

    After spreading the butter, sprinkle ¼ cup of brown sugar mixed with 1 tablespoon of cinnamon over the surface. Roll and cut as directed. These are sweet, breakfast‑style biscuits. Drizzle with a simple powdered sugar glaze.

    4. Everything Bagel Swirl Biscuits

    After brushing the tops with buttermilk, sprinkle with everything bagel seasoning. The garlic, onion, poppy, and sesame seeds add incredible crunch and flavor.

    5. Jalapeño Cheddar Swirl Biscuits

    Add ½ cup of finely chopped pickled jalapeños (drained) and ¾ cup of shredded pepper jack cheese to the butter layer. The spicy, cheesy combination is perfect for chili or gumbo.

    6. Gluten‑Free Butter Swirl Biscuits

    Use a gluten‑free 1:1 flour blend (like King Arthur). Add ¼ teaspoon of xanthan gum if your blend does not already contain it. The dough will be more fragile, but the swirl technique still works.

    Use vegan butter (cold for the dough, softened for the swirl) and plant‑based buttermilk (add 1 tablespoon of vinegar to 1 cup of unsweetened almond milk). The results are surprisingly flaky.

    Mix 2 tablespoons of honey into the softened butter before spreading. The honey caramelizes slightly during baking, adding a touch of sweetness.

    How to Store, Freeze, and Reheat

    Room Temperature

    Store baked biscuits in an airtight container for up to 3 days. Reheat in a 300°F oven for 5‑7 minutes to restore crispness.

    Refrigerator

    Store in an airtight container for up to 1 week. Reheat as above.

    Freezer (Unbaked)

    Arrange shaped biscuits on a parchment‑lined baking sheet and freeze until solid (about 2 hours). Transfer to a freezer‑safe bag. Freeze for up to 3 months. Bake frozen at 425°F for 15‑18 minutes (add 3‑5 minutes to baking time). Do not thaw.

    Freezer (Baked)

    Cool biscuits completely, wrap tightly in plastic wrap and foil, and freeze for up to 2 months. Thaw at room temperature, then reheat in a 300°F oven for 5‑10 minutes.

    Make Ahead for Breakfast

    Assemble the biscuits, cut them, and place them on a parchment‑lined baking sheet. Cover with plastic wrap and refrigerate overnight. Bake fresh in the morning – add 2‑3 minutes to the baking time.

    What to Serve with Butter Swirl Biscuits

    • Butter and honey – Simple perfection.
    • Sausage gravy – Classic Southern breakfast.
    • Fried chicken – The ultimate comfort meal.
    • Jam or preserves – Raspberry, strawberry, or blackberry.
    • Eggs and bacon – A hearty breakfast.
    • Soup or chili – For dipping.
    • Ham and cheese – Make into breakfast sandwiches.

    Frequently Asked Questions

    Why are my biscuits not flaky?

    Lack of flakiness usually means the butter was not cold enough, the dough was overworked, or the oven temperature was too low. Use very cold butter, handle the dough as little as possible, and bake at 425°F. The swirl technique helps, but these factors still matter.

    Can I use salted butter?

    Yes. If using salted butter, reduce the added salt to ½ teaspoon. Unsalted butter gives you more control over the flavor.

    Why did my biscuits spread instead of rise tall?

    Spreading happens when the dough is too warm when it goes into the oven. Chill the shaped biscuits for 10‑15 minutes before baking if your kitchen is warm. Also, make sure your baking powder is fresh.

    Can I make these without buttermilk?

    Yes. Mix 1 cup of regular milk with 1 tablespoon of lemon juice or white vinegar. Let sit for 5 minutes. It will thicken slightly and work as a buttermilk substitute.

    How many calories are in a butter swirl biscuit?

    One biscuit contains approximately 280‑350 calories, 16g fat, 34g carbohydrates, and 6g protein. This is a rich, indulgent biscuit – perfect for special occasions.

    Can I use a food processor to cut in the butter?

    Yes. Pulse the dry ingredients with the cold butter in a food processor until the mixture resembles coarse meal. Transfer to a bowl and stir in the buttermilk by hand. Do not over‑process, or the butter will melt.

    The Art of Laminated Biscuits

    The butter swirl technique is a simplified version of lamination – the process used to make croissants and puff pastry. By rolling and folding the dough with a layer of butter, you create alternating layers of dough and fat. When baked, the water in the butter turns to steam, pushing the layers apart and creating the flaky, airy texture. This recipe takes that technique and makes it accessible for home bakers. The result is a biscuit that is impressive enough for company but easy enough for a weekend morning. This homemade layered biscuit recipe is a true kitchen treasure.

    Why You Should Make These Butter Swirl Biscuits This Weekend

    You probably have flour, butter, and buttermilk in your kitchen right now. Baking powder and salt are pantry staples. In under an hour, you can create biscuits that are flaky, buttery, and swirled with visible layers of butter. They are perfect for:

    • Sunday morning breakfast with eggs and bacon – The ultimate treat.
    • Thanksgiving or Christmas dinner – Alongside turkey and gravy.
    • Brunches with friends – Make ahead and bake fresh.
    • Freezer stocking for busy mornings – Bake from frozen for fresh biscuits anytime.
    • When you want to impress without stress – The swirls look fancy, but the technique is simple.

    The first time I made butter swirl biscuits, my family gathered around the oven, watching through the glass as they rose tall and golden. The swirls of butter were visible even before we pulled them apart. One bite, and everyone fell silent – then came the requests for the recipe. Now these biscuits are a staple at every holiday meal and lazy Sunday breakfast. They never last more than an hour.

    So cut that cold butter, roll that dough, and get ready to bake the most flaky, buttery, beautiful butter swirl biscuits of your life.

    Final Thoughts

    Butter Swirl Biscuits are proof that a few extra minutes of technique can transform a simple recipe into something extraordinary. The visible swirls of butter, the tender flaky layers, the rich, savory flavor – these are biscuits that people remember. Whether you keep them classic or experiment with cheese, herbs, or cinnamon sugar, these biscuits will earn a permanent spot in your baking rotation. This truly is the best flaky butter biscuit recipe for any occasion.

    So go ahead – make them this weekend. Pull them apart warm, watch the steam rise, and slather them with butter and jam. Enjoy every flaky, buttery, glorious bite.


    Have you made butter swirl biscuits? What’s your favorite twist – cheddar and chive, garlic herb, or cinnamon sugar? Share your photos and tips in the comments below. And if this recipe became a family tradition, save it for later or send it to a friend who loves homemade bread.

  • Sweetened Condensed Milk Cake – Moist, Dense, and Irresistibly Rich

    Sweetened Condensed Milk Cake – Moist, Dense, and Irresistibly Rich

    There are cakes that are light and airy, and then there is Sweetened Condensed Milk Cake – the kind that is dense, velvety, and almost fudge‑like in its richness. Imagine a golden, caramel‑tinged cake with a tight, tender crumb that melts on your tongue. Each bite is sweet, buttery, and deeply satisfying, with a hint of vanilla and a whisper of nostalgia. This is the cake your grandmother might have made when she wanted something special without a lot of fuss. The secret is a whole can of sweetened condensed milk, which provides both sweetness and moisture, creating a cake that stays fresh for days and tastes even better the next morning with a cup of coffee. If you are searching for a sweetened condensed milk cake recipe that is simple, foolproof, and absolutely delicious, this is the one.

    Whether you need a dessert for a family dinner, a bake sale, a birthday celebration, or simply a snack to enjoy with tea, this cake delivers. It comes together in one bowl, requires no fancy techniques, and is endlessly customizable. This old fashioned condensed milk cake will become a staple in your kitchen.

    In this complete guide, you will learn the master recipe for sweetened condensed milk cake, including pro tips for the perfect texture, delicious variations (add chocolate, coconut, or a citrus glaze), storage and freezing instructions, and why this humble ingredient creates such a magical result. Let’s preheat that oven.

    Why Sweetened Condensed Milk Cake Is a Timeless Treasure

    Sweetened condensed milk was invented in the 19th century as a way to preserve milk without refrigeration. Bakers quickly discovered that its thick, sweet, caramelized flavor could transform simple cakes into something extraordinary. Unlike regular milk, condensed milk adds richness, tenderness, and a subtle caramel note to baked goods. This cake is a perfect example: it is denser than a traditional butter cake, with a tight crumb that almost resembles a pound cake. It stays moist for days, making it ideal for make‑ahead desserts, potlucks, and gift giving. This is a tres leches style cake without the three milks – just pure condensed milk magic.

    Here is why you will love it:

    • Only 10 minutes of prep – Then the oven does the work.
    • Uses a full can of sweetened condensed milk – No waste, maximum flavor.
    • Incredibly moist and tender – Stays fresh for days.
    • One bowl, no mixer needed – Simple and easy.
    • Customizable – Add chocolate chips, coconut, or a citrus glaze.
    • Freezes beautifully – Make ahead and enjoy later.
    • Perfect for any occasion – From casual snacks to holiday tables.

    Once you try this easy condensed milk loaf cake, you will never look at a can of sweetened condensed milk the same way.

    The Complete Sweetened Condensed Milk Cake Recipe

    This recipe makes one 9×5 inch loaf cake or one 8×8 inch square cake. It can easily be doubled for a 9×13 pan.

    Ingredients:

    • 1 can (14 oz / 397g) sweetened condensed milk
    • ½ cup (113g, 1 stick) unsalted butter, melted and slightly cooled
    • 2 large eggs, room temperature
    • 1 teaspoon vanilla extract
    • 1 ½ cups (190g) all‑purpose flour
    • 1 ½ teaspoons baking powder
    • ¼ teaspoon salt
    • Optional: ½ cup (90g) chocolate chips, shredded coconut, or chopped nuts

    Equipment:

    • 9×5 inch loaf pan or 8×8 inch square pan
    • Parchment paper or non‑stick spray
    • Mixing bowl
    • Whisk or spatula
    • Cooling rack

    Step‑by‑Step Instructions

    Step 1 – Preheat and Prepare the Pan

    Preheat your oven to 350°F (175°C). Grease a 9×5 inch loaf pan with butter or non‑stick spray, then line the bottom with parchment paper (leaving an overhang on two sides for easy removal). Set aside.

    Step 2 – Combine the Wet Ingredients

    In a large mixing bowl, whisk together the sweetened condensed milk, melted butter, eggs, and vanilla extract until smooth and well combined. The mixture will be thick and glossy.

    Step 3 – Add the Dry Ingredients

    In a separate bowl, whisk together the flour, baking powder, and salt. Gradually add the dry ingredients to the wet mixture, stirring with a spatula just until combined. Do not overmix – a few small lumps are fine. If you are adding chocolate chips, coconut, or nuts, fold them in now.

    Step 4 – Pour and Bake

    Pour the batter into the prepared pan and smooth the top. Bake for 35‑40 minutes (loaf pan) or 30‑35 minutes (square pan), until a toothpick inserted in the center comes out clean or with a few moist crumbs. The cake should be golden brown and spring back when lightly pressed.

    Step 5 – Cool

    Let the cake cool in the pan for 15 minutes, then transfer to a wire rack to cool completely. This cake is delicious warm, but it is best when completely cooled – the texture becomes dense and fudgy.

    Step 6 – Serve

    Slice and serve plain, dusted with powdered sugar, or with a drizzle of caramel or chocolate sauce. This rich condensed milk cake is wonderful with coffee or tea.

    Pro Tips for the Best Sweetened Condensed Milk Cake

    Follow these expert tips for a perfectly moist condensed milk cake every time:

    • Use room temperature eggs – Cold eggs can cause the batter to seize. Leave them out for 30 minutes before starting.
    • Do not overmix the batter – Overmixing develops gluten, which can make the cake tough. Mix just until the flour disappears.
    • Check for doneness early – Ovens vary. Start checking the cake at 30 minutes. A toothpick should come out clean or with a few moist crumbs – not wet batter.
    • Let the cake cool completely before slicing – The crumb sets as it cools. Warm cake can be crumbly.
    • Store properly – This cake stays moist at room temperature for up to 5 days. Do not refrigerate unless necessary, as it can dry out.
    • Double the recipe for a crowd – A 9×13 pan works perfectly. Bake at 350°F for 40‑45 minutes.

    Delicious Variations (Same Condensed Milk Base)

    Once you master the classic sweetened condensed milk cake, try these fun twists. These condensed milk cake variations will keep your baking exciting.

    1. Chocolate Sweetened Condensed Milk Cake

    Add ¼ cup of unsweetened cocoa powder to the dry ingredients (reduce flour by ¼ cup). Fold in ½ cup of chocolate chips. The chocolate version is rich and decadent.

    2. Coconut Condensed Milk Cake

    Add ½ cup of sweetened shredded coconut to the batter. Sprinkle another ¼ cup of coconut on top before baking. The coconut toasts to golden perfection.

    3. Lemon Condensed Milk Cake

    Add 2 tablespoons of fresh lemon zest and 2 tablespoons of lemon juice (reduce the vanilla to ½ teaspoon). The bright citrus cuts through the sweetness beautifully.

    4. Orange Creamsicle Cake

    Add 1 tablespoon of orange zest and ¼ cup of fresh orange juice. Add ½ cup of white chocolate chips. This tastes like a creamsicle.

    5. Marble Condensed Milk Cake

    Prepare half the batter as plain vanilla. To the other half, add 2 tablespoons of cocoa powder and 2 tablespoons of milk. Swirl the two batters together in the pan for a marble effect.

    Use a 1:1 gluten‑free flour blend (like King Arthur). Add ¼ teaspoon of xanthan gum if your blend does not already contain it. The texture will be slightly more delicate but still delicious.

    7. Vegan Condensed Milk Cake

    Use a plant‑based sweetened condensed milk (like Nature’s Charm). Use vegan butter and a flax egg (1 tbsp ground flax + 3 tbsp water). The result is surprisingly close to the original.

    Mix 2 tablespoons of brown sugar with 1 tablespoon of cinnamon. After pouring the batter into the pan, sprinkle the cinnamon sugar over the top and swirl with a knife.

    How to Store, Freeze, and Make Ahead

    Room Temperature

    Store the cake in an airtight container at room temperature for up to 5 days. The high sugar content keeps it moist.

    Refrigerator

    If you live in a very warm climate or if the cake has a dairy‑based frosting, refrigerate for up to 1 week. Bring to room temperature before serving.

    Freezer (Whole Cake)

    Wrap the cooled cake tightly in plastic wrap, then aluminum foil. Freeze for up to 3 months. Thaw at room temperature for 2‑3 hours.

    Freezer (Slices)

    Wrap individual slices in plastic wrap and place in a freezer bag. Thaw slices at room temperature for 20 minutes.

    Make Ahead for a Party

    Bake the cake 1‑2 days ahead, wrap tightly, and store at room temperature. This cake actually improves after a day as the flavors meld.

    What to Serve with Sweetened Condensed Milk Cake

    • Fresh berries – Raspberries, strawberries, or blueberries.
    • Whipped cream – Light and airy contrast.
    • A dusting of powdered sugar – Simple and elegant.
    • Caramel sauce or chocolate ganache – For extra indulgence.
    • A cup of hot coffee or strong black tea – The perfect pairing.
    • Vanilla ice cream – Turn a slice into a sundae.

    Frequently Asked Questions

    Can I use low‑fat or fat‑free sweetened condensed milk?

    You can, but the cake will be less rich and tender. Full‑fat sweetened condensed milk gives the best texture and flavor. If using low‑fat, add an extra 2 tablespoons of melted butter to compensate.

    Why is my cake dense and heavy?

    Sweetened condensed milk cake is supposed to be denser than a classic butter cake – it is closer to a pound cake in texture. However, if it is overly heavy, you may have overmixed the batter or used too much flour. Measure flour correctly (spoon and level) and mix just until combined.

    Can I use this batter for cupcakes?

    Yes. Fill lined muffin cups about ⅔ full. Bake at 350°F for 18‑22 minutes. This makes about 12‑14 cupcakes. Frost with buttercream or cream cheese frosting.

    How many calories are in a slice of sweetened condensed milk cake?

    One slice (1/10 of the loaf) contains approximately 320‑400 calories, 15g fat, 48g carbohydrates, and 7g protein. This is a rich, satisfying dessert – perfect for special occasions.

    Can I add a glaze or frosting?

    Absolutely. A simple powdered sugar glaze (1 cup powdered sugar + 2 tablespoons milk + ½ teaspoon vanilla) drizzled over the cooled cake is lovely. Cream cheese frosting also pairs beautifully.

    Can I make this in a bundt pan?

    Yes. Use a 10‑cup bundt pan. Double the recipe. Bake at 325°F for 45‑55 minutes, until a toothpick comes out clean. Grease the bundt pan very well.

    The History of Sweetened Condensed Milk in Baking

    Sweetened condensed milk was invented by Gail Borden in 1856 as a way to preserve milk without refrigeration. It became a staple in American kitchens, especially in the South, where fresh milk was not always available. Bakers discovered that condensed milk added moisture, sweetness, and a unique caramel flavor to cakes, pies, and candies. The most famous condensed milk dessert is probably key lime pie, but this simple cake is a lesser‑known gem. It is sometimes called “cajeta cake” or “leche cake” and is beloved in Latin American and Southern baking traditions. This vintage condensed milk dessert deserves a place in every baker’s repertoire.

    Why You Should Make This Sweetened Condensed Milk Cake This Week

    You probably have a can of sweetened condensed milk in your pantry (or can buy one for a few dollars). Butter, eggs, flour, and baking powder are basic staples. In under 45 minutes, you can create a cake that is moist, dense, and deeply satisfying. It is perfect for:

    • Everyday dessert with coffee or tea – A simple pleasure.
    • Potlucks and bake sales – Travels well, serves many.
    • Last‑minute dinner parties – Impressive without stress.
    • Gifts for neighbors and teachers – Wrap in parchment and tie with twine.
    • When you need a taste of nostalgia – Reminds you of grandma’s kitchen.

    The first time I made this sweetened condensed milk cake, I was skeptical that something so simple could be so good. But when I pulled the golden loaf from the oven, the smell was intoxicating. The first slice was dense, velvety, and perfectly sweet. My family devoured it in one sitting. Now I always keep a can of sweetened condensed milk in the pantry for emergency cake cravings.

    So open that can, whisk that batter, and get ready to bake the most delicious, moist, sweetened condensed milk cake of your life.

    Final Thoughts

    Sweetened Condensed Milk Cake proves that you do not need a dozen exotic ingredients to create something extraordinary. A single can of condensed milk, combined with basic pantry staples, transforms into a cake that is moist, dense, and deeply satisfying. Whether you keep the classic version or experiment with chocolate, coconut, or citrus, this cake will earn a permanent spot in your recipe collection. This truly is the best easy condensed milk cake for any occasion.

    So go ahead – make it today. Slice it, share it, and enjoy every sweet, buttery, tender bite.


    Have you made sweetened condensed milk cake? What’s your favorite variation – chocolate, coconut, or a citrus glaze? Share your photos and tips in the comments below. And if this recipe became a new favorite, save it for later or send it to a friend who loves simple, delicious baking.

  • Amish Hamburger Casserole – A Hearty, Old-Fashioned Classic That Fills Your Home With Comfort

    Amish Hamburger Casserole – A Hearty, Old-Fashioned Classic That Fills Your Home With Comfort

    There are casseroles that are merely convenient, and then there is Amish Hamburger Casserole – the kind of rustic, stick-to-your-ribs meal that tastes like generations of farmhouse wisdom in every single bite. Imagine tender potatoes, seasoned ground beef, sweet onions, and a velvety, creamy tomato sauce, all baked together under a golden blanket of melted cheddar cheese. This is not fussy food. This is the food that appears on church supper tables after Sunday services, the food that neighbors bring to new parents, the food that disappears before you have even made it down the potluck line. If you are searching for a hearty Amish hamburger casserole recipe that is filling, flavorful, and endlessly flexible, you have found it.

    Whether you need a budget‑friendly weeknight dinner, a slow cooker meal for busy days, or a vintage dish to bring to a family reunion, this casserole delivers. It is naturally customizable – from the classic beef‑and‑potato layered bake known as “Shipwreck Casserole” to the creamy noodle version sometimes called Yumasetti. This old-fashioned ground beef casserole will become a staple in your kitchen.

    In this complete guide, you will learn the authentic Amish hamburger casserole traditions, including the famous layered “Shipwreck” style, pro tips for the perfect texture, delicious variations (add mushrooms, swap in rice, or make it cheesy), storage and freezing instructions, and why this simple, humble dish has been loved for generations. Let’s preheat that oven.

    What Makes Amish Hamburger Casserole So Special?

    Amish cooking is the original farm-to-table comfort food. Known for simple, hearty meals made with homegrown ingredients, these casseroles are the kind of food that feels like a warm hug after a long day. The beauty of Amish hamburger casserole lies in its flexibility. You can make it with potatoes or noodles, with a tomato‑based sauce or a creamy mushroom sauce, baked in the oven or simmered in a slow cooker. The constants are affordable ingredients (ground beef, potatoes or pasta, onions, and cheese) and a cooking method that lets the flavors meld into something far greater than the sum of their parts. This is a farmhouse comfort food that has stood the test of time.

    Here is why you will love it:

    • Only 10 minutes of prep – Then the oven does the work.
    • Budget‑friendly – Ground beef, potatoes, and pantry staples.
    • Incredibly hearty and filling – A complete meal in one dish.
    • Customizable – Make it with noodles, add vegetables, or use turkey.
    • Great for meal prep and freezing – Tastes even better the next day.
    • Kid‑approved and adult‑loved – Pure comfort.
    • Naturally gluten‑free adaptable (omit flour or use cornstarch).

    Once you try this Amish ground beef and potato casserole, you will understand why it has been a family secret for decades.

    The Complete Amish Hamburger Casserole Recipe (Shipwreck Style)

    This recipe makes one 9×13 inch casserole (about 8 servings). It can easily be doubled.

    Ingredients:

    • 1 lb (450g) lean ground beef
    • 1 medium yellow onion, diced
    • 3 medium russet potatoes (about 1.5 lbs), thinly sliced (¼‑inch thick)
    • 2 carrots, sliced (optional, for traditional farmhouse version)
    • 2 celery stalks, chopped (optional)
    • 2 cloves garlic, minced
    • 1 can (14.5 oz) diced tomatoes, with juices
    • 1 can (10.75 oz) condensed tomato soup (or cream of mushroom soup)
    • 1 cup (240ml) beef broth (or water)
    • 1 teaspoon salt
    • ½ teaspoon black pepper
    • 1 teaspoon paprika
    • ½ teaspoon dried thyme or oregano
    • 1 cup (120g) shredded cheddar cheese (optional, for topping)

    Equipment:

    • 9×13 inch baking dish
    • Large skillet
    • Cutting board and knife
    • Mixing bowl
    • Aluminum foil

    Step‑by‑Step Instructions

    Step 1 – Preheat and Prepare

    Preheat your oven to 350°F (175°C). Grease a 9×13 inch baking dish with butter or non‑stick spray. Set aside.

    Step 2 – Brown the Ground Beef

    In a large skillet over medium‑high heat, cook the ground beef, breaking it up with a spoon, until browned and no longer pink, about 5‑7 minutes. Add the diced onion, garlic, carrots, and celery (if using). Cook for 3‑4 minutes until the vegetables soften. Drain any excess fat.

    Step 3 – Make the Sauce

    In a medium bowl, whisk together the diced tomatoes (with juice), tomato soup, beef broth, salt, pepper, paprika, and thyme. Set aside.

    Step 4 – Layer the Casserole

    Spread half of the sliced potatoes in the bottom of the prepared baking dish. Top with half of the ground beef mixture. Repeat with the remaining potatoes and the rest of the beef mixture. Pour the sauce evenly over the top. Gently shake the dish to let the liquid settle between the layers. Cover tightly with aluminum foil.

    Step 5 – Bake

    Bake covered for 1 hour. Remove the foil, sprinkle the shredded cheddar cheese over the top, and bake uncovered for an additional 15‑20 minutes, until the cheese is melted and bubbly and the potatoes are fork‑tender.

    Step 6 – Rest and Serve

    Let the casserole rest for 10 minutes before serving. This allows the layers to set. Serve hot, with crusty bread or a side salad.

    Pro Tips for the Best Amish Hamburger Casserole

    Follow these expert tips for a perfect farmhouse casserole every time:

    • Slice potatoes uniformly thin – Use a mandoline or a sharp knife. Even slices ensure they cook through at the same time.
    • Do not skip covering with foil – The covered bake steams the potatoes until tender. Uncover too soon and they may stay crunchy.
    • Use leftover roast beef or cooked ground beef from the freezer – This casserole is forgiving and works with pre‑cooked meat.
    • Add a crunchy topping – For extra texture, mix ½ cup of breadcrumbs with 2 tablespoons of melted butter and sprinkle over the cheese during the last 10 minutes.
    • Make it creamy – Replace the tomato soup with cream of mushroom soup and add ½ cup of sour cream to the sauce.
    • Let it rest before serving – The casserole will be very hot. Resting helps it set and makes serving easier.

    Delicious Variations (Same Amish Spirit)

    1. Amish Yumasetti (Creamy Noodle Casserole)

    Replace the potatoes with 3 cups of cooked egg noodles. Use cream of mushroom soup instead of tomato soup. Add ½ cup of sour cream and 1 cup of frozen peas. Top with shredded cheddar and crushed potato chips.

    2. Slow Cooker Amish Hamburger Casserole

    Brown the beef and onions, then layer in a slow cooker: potatoes, beef, sauce. Cook on LOW for 6‑7 hours or HIGH for 3‑4 hours. Top with cheese during the last 30 minutes.

    3. Cheesy Amish Hamburger Casserole

    Add 1 cup of shredded cheddar to the sauce and sprinkle another cup on top. Use a blend of cheddar and mozzarella for extra gooeyness.

    4. Tex‑Mex Amish Casserole

    Add 1 can of diced green chilies, 1 teaspoon of cumin, and ½ teaspoon of chili powder. Use pepper jack cheese instead of cheddar.

    5. Low‑Carb / Keto Amish Casserole

    Replace potatoes with 4 cups of cauliflower florets or sliced turnips. Use a keto‑friendly tomato sauce (no added sugar).

    6. Amish Breakfast Casserole

    Layer potatoes, cooked breakfast sausage instead of ground beef, and pour a mixture of 8 beaten eggs with ½ cup of milk over the top. Bake covered for 45 minutes, then top with cheese.

    How to Store, Freeze, and Reheat

    Refrigerator

    Store leftovers in an airtight container for up to 4 days. Reheat in a 350°F oven covered for 15‑20 minutes or microwave individual portions.

    Freezer (Baked)

    Cool completely, then wrap the dish tightly with plastic wrap and foil. Freeze for up to 2 months. Thaw overnight in the refrigerator, then reheat covered at 350°F for 30‑40 minutes.

    Freezer (Unbaked)

    Assemble the casserole (without cheese). Cover and freeze for up to 2 months. Thaw overnight, add cheese, and bake as directed, adding 10‑15 minutes.

    What to Serve with Amish Hamburger Casserole

    • Simple green salad with vinaigrette – Cuts through the richness.
    • Buttered bread or dinner rolls – For sopping up the sauce.
    • Steamed green beans or roasted broccoli – Adds color and nutrients.
    • A cold glass of milk or iced tea – Classic pairing.

    Frequently Asked Questions

    Can I use raw ground beef without browning?

    You can, but browning adds significant flavor. If you skip browning, the casserole will be less savory and may have a greasy layer. Brown the meat – it is worth the few extra minutes.

    Why is it called “Shipwreck Casserole”?

    Some Amish communities call this layered beef‑and‑potato casserole “Shipwreck” because the ingredients are “shipwrecked” or scattered in layers rather than mixed. Others call it “John Wayne Casserole.” Whatever the name, it is delicious.

    Can I use sweet potatoes instead of russets?

    Yes. Sweet potatoes add a subtle sweetness that pairs well with the tomato sauce. Slice them similarly and bake as directed.

    How many calories are in a serving?

    One serving (1/8 of the casserole) contains approximately 380‑450 calories, 18g fat, 35g carbohydrates, and 28g protein. This is a hearty, nourishing meal – perfect for active families.

    Can I make this dairy‑free?

    Yes. Omit the cheese or use a dairy‑free shred. Use a dairy‑free soup (or make a roux with olive oil and flour).

    The Amish Tradition of Simple, Hearty Cooking

    Amish communities value simplicity, frugality, and family. Their cooking reflects these values: meals are made from scratch using homegrown vegetables, farm‑raised meat, and basic pantry staples. Casseroles are a natural fit because they can be prepared ahead, use up leftovers, and feed large families. This hamburger casserole, in its many forms, is a beloved dish at church potlucks (known as “dinner on the grounds”), after weddings, and on cold winter nights. It is food that nourishes both body and soul.

    Why You Should Make This Amish Hamburger Casserole This Week

    You probably have ground beef, potatoes, onions, and canned tomatoes in your kitchen right now. In about 20 minutes of active prep, you can create a dinner that feels like a farmhouse Sunday supper. It is perfect for:

    • Busy weeknights – Assemble ahead and bake when ready.
    • Meal prep for the week – A big pan feeds a crowd or provides leftovers.
    • Cold weather comfort – Warm, hearty, and satisfying.
    • Family gatherings and potlucks – Always a hit.
    • When you need a taste of nostalgia – Grandma’s kitchen in a dish.

    The first time I made this Amish hamburger casserole, the smell of browning beef and sweet onions filled my house. My family gathered in the kitchen, asking when dinner would be ready. When I pulled the golden, bubbly casserole from the oven, there was silence – then the sound of forks scraping against the dish. It was gone before anyone asked for seconds. Now it is my go‑to for busy winter nights.

    So slice those potatoes, brown that beef, and get ready to bake the most comforting, old‑fashioned Amish hamburger casserole of your life.

    Final Thoughts

    Amish Hamburger Casserole is proof that the simplest ingredients create the most lasting memories. Layered potatoes, seasoned ground beef, a tomato‑based sauce, and a blanket of melted cheese – humble, honest, and deeply satisfying. Whether you keep the classic shipwreck style or experiment with noodles, cream sauces, or vegetables, this casserole will earn a permanent spot in your recipe collection. This truly is the best Amish ground beef casserole for family dinners.

    So go ahead – make it tonight. Watch the smiles around the table. And enjoy every hearty, comforting, farmhouse bite.


    Have you made Amish hamburger casserole? What’s your family’s favorite variation – shipwreck, Yumasetti, or a cheesy twist? Share your photos and tips in the comments below. And if this recipe brought back a fond memory, save it for later or send it to a friend who needs a little comfort food.

  • Cherry Crumble Bars – Buttery, Fruit‑Filled, and Impossible to Resist

    Cherry Crumble Bars – Buttery, Fruit‑Filled, and Impossible to Resist

    There are bars that are good, and then there are Cherry Crumble Bars – the kind of dessert that makes people hover around the pan, waiting for you to cut the first square. Imagine a tender, buttery shortbread crust, a layer of sweet‑tart cherry filling that bubbles and jams as it bakes, and a golden, crunchy streusel topping that shatters with every bite. These bars are the perfect marriage of a fruit pie and a crumb cake, all in a portable, shareable, bake‑sale‑ready format. They are simple enough for a weeknight treat but impressive enough for holiday dessert tables. If you are searching for a cherry crumble bars recipe that delivers on flavor, texture, and ease, this is the one.

    Whether you use fresh cherries, frozen cherries, or a can of cherry pie filling, these bars come together quickly and taste like pure nostalgia. They are naturally adaptable, freezer‑friendly, and always the first to disappear. This homemade cherry streusel bars recipe will become a family favorite.

    In this complete guide, you will learn the master recipe for cherry crumble bars, including pro tips for avoiding a soggy bottom, delicious variations (add almond extract, use blueberries, or add a drizzle of glaze), storage and freezing instructions, and why this simple layered dessert is pure baking magic. Let’s preheat that oven.

    Why Cherry Crumble Bars Are a Bake Sale Legend

    Cherry crumble bars combine the best of several worlds: the buttery, shortbread‑like crust of a bar cookie, the jammy, fruity center of a pie, and the crunchy, streusel‑like topping of a coffee cake. They are sturdy enough to hold in your hand, making them perfect for bake sales, picnics, and lunchboxes. The filling can be made from scratch with fresh or frozen cherries, or you can use canned cherry pie filling for a shortcut. Either way, the result is a dessert that is both rustic and elegant. This is a fruit crumb bar recipe that celebrates cherry season.

    Here is why you will love it:

    • Only 15 minutes of prep – Then the oven does the work.
    • Buttery, tender crust – No rolling required.
    • Sweet‑tart cherry filling – Bursting with real fruit flavor.
    • Crunchy, golden streusel topping – The perfect finish.
    • Customizable – Use any fruit or pie filling you like.
    • Freezer‑friendly and great for meal prep
    • Perfect for bake sales, potlucks, and holiday dessert tables

    Once you try these easy cherry pie bars, you will never bring a box of cookies again.

    The Complete Cherry Crumble Bars Recipe

    This recipe makes one 9×13 inch pan of bars (about 16-24 squares). It can easily be doubled.

    Ingredients – For the Crust and Crumble Topping:

    • 2 ½ cups (300g) all‑purpose flour
    • 1 cup (200g) granulated sugar
    • 1 teaspoon baking powder
    • ½ teaspoon salt
    • 1 cup (226g, 2 sticks) cold unsalted butter, cut into small cubes
    • 1 large egg, lightly beaten
    • 1 teaspoon vanilla extract

    Ingredients – For the Cherry Filling:

    • 3 cups fresh or frozen sweet or tart cherries, pitted and halved (about 1 lb / 450g)
    • ½ cup (100g) granulated sugar (adjust depending on cherry sweetness)
    • 2 tablespoons cornstarch
    • 2 tablespoons fresh lemon juice
    • 1 teaspoon vanilla extract
    • ¼ teaspoon almond extract (optional, but highly recommended)

    Shortcut option: Use 1 can (21 oz) cherry pie filling instead of fresh cherries. Omit the sugar, cornstarch, and lemon juice if using pie filling.

    Optional Glaze:

    • ½ cup (60g) powdered sugar
    • 1‑2 tablespoons milk or cherry juice
    • ¼ teaspoon vanilla extract

    Equipment:

    • 9×13 inch baking pan
    • Parchment paper or non‑stick spray
    • Large mixing bowl
    • Pastry blender or two forks
    • Rubber spatula
    • Cooling rack

    Step‑by‑Step Instructions

    Step 1 – Preheat and Prepare the Pan

    Preheat your oven to 375°F (190°C). Grease a 9×13 inch baking pan with butter or non‑stick spray, then line the bottom with parchment paper (leaving overhangs on two sides for easy removal). Set aside.

    Step 2 – Make the Crumb Dough (Crust + Topping)

    In a large bowl, whisk together the flour, sugar, baking powder, and salt. Add the cold butter cubes. Using a pastry blender or two forks, cut the butter into the dry ingredients until the mixture resembles coarse crumbs with pea‑sized butter pieces. You should have a crumbly mixture. Add the beaten egg and vanilla extract, and mix with a fork until the dough begins to clump together. It will still be crumbly – that is perfect.

    Step 3 – Reserve Topping and Press Crust

    Set aside 1 ½ cups of the crumb mixture for the topping. Press the remaining mixture firmly and evenly into the bottom of the prepared pan. Use the back of a measuring cup or your fingers to create a compact, even layer. This will be the crust.

    Step 4 – Prepare the Cherry Filling

    In a medium saucepan (if using fresh/frozen cherries), combine the cherries, sugar, cornstarch, lemon juice, vanilla, and almond extract (if using). Cook over medium heat, stirring constantly, until the mixture thickens and becomes glossy, about 5‑7 minutes. The cherries will release their juices and the cornstarch will activate. Remove from heat and let cool slightly. If using canned cherry pie filling, simply stir it in a bowl to loosen.

    Step 5 – Assemble the Bars

    Spread the cherry filling evenly over the prepared crust. Use a spatula to cover all the way to the edges. Sprinkle the reserved crumb mixture evenly over the cherry filling, gently pressing it down so it adheres.

    Step 6 – Bake

    Bake at 375°F for 30‑35 minutes, until the topping is golden brown and the filling is bubbling around the edges. Rotate the pan halfway through for even baking. Let the bars cool completely in the pan on a wire rack – at least 2 hours. Cooling allows the filling to set, making clean cuts possible.

    Step 7 – Optional Glaze

    Once cooled, whisk together the powdered sugar, milk (or cherry juice), and vanilla until smooth. Drizzle over the bars. Let the glaze set for 10‑15 minutes before slicing.

    Step 8 – Slice and Serve

    Use the parchment overhangs to lift the bars out of the pan. Place on a cutting board and cut into squares or rectangles. Wipe the knife clean between cuts for neat edges. Serve at room temperature.

    Pro Tips for the Best Cherry Crumble Bars

    Follow these expert tips for perfect fruit crumb bars every time:

    • Use cold butter – Cold butter is essential for a flaky, tender crust and crumbly topping. Warm butter will melt into the flour and create a dense, greasy texture.
    • Do not overmix the crumb dough – You want pea‑sized butter pieces. Overmixing will make the crust tough.
    • Press the crust firmly – A compact, even crust prevents the filling from seeping underneath. Use the bottom of a measuring cup for even pressure.
    • Thicken the filling properly – If using fresh cherries, cook the filling until it is thick and jammy. A runny filling will make the bars soggy.
    • Let the bars cool completely – This is the hardest step but the most important. Warm bars will fall apart when cutting. Patience yields clean, beautiful squares.
    • Add almond extract – Almond extract amplifies the cherry flavor like magic. Do not skip it if you have it.
    • Use parchment paper – Lifting the entire slab out of the pan makes cutting much easier and prevents damage.

    Delicious Variations (Same Crumb Base)

    Once you master the classic cherry crumble bars, try these fun twists. These crumble bar variations will keep your baking exciting.

    1. Blueberry Crumble Bars

    Substitute fresh or frozen blueberries for the cherries. Add 1 teaspoon of lemon zest to the filling. The blueberry version is equally delicious.

    2. Raspberry Crumble Bars

    Use raspberries instead of cherries. Reduce sugar slightly (raspberries are more tart, but they also have less natural sugar – taste and adjust).

    3. Peach Crumble Bars

    Use 3 cups of peeled, diced fresh peaches. Add ½ teaspoon of cinnamon to the filling. Peach crumble bars taste like summer.

    4. Apple Cinnamon Crumble Bars

    Use 3 cups of peeled, diced Granny Smith apples. Add 1 teaspoon of cinnamon and ¼ teaspoon of nutmeg to the filling. These are perfect for fall.

    5. Cherry Almond Crumble Bars

    Add ½ cup of sliced almonds to the crumb topping. Use almond extract in the filling (already included). The nutty crunch is wonderful.

    6. Lemon Cherry Crumble Bars

    Add 1 tablespoon of lemon zest to the crust mixture and 2 tablespoons of lemon juice to the filling. The bright citrus complements the cherries.

    7. Gluten‑Free Cherry Crumble Bars

    Use a 1:1 gluten‑free flour blend (like King Arthur). Add ¼ teaspoon of xanthan gum if your blend does not already contain it. The texture will be slightly more delicate but still delicious.

    Replace the butter with vegan butter (cold). Replace the egg with ¼ cup of unsweetened applesauce. Use a plant‑based milk for the glaze. The vegan version is surprisingly close to the original.

    How to Store, Freeze, and Make Ahead

    Room Temperature

    Store bars in an airtight container at room temperature for up to 4 days. The crumb topping will soften slightly but the flavor remains excellent.

    Refrigerator

    If you prefer a firmer bar or if your kitchen is warm, store in the refrigerator for up to 1 week. Bring to room temperature before serving.

    Freezer (Baked Bars)

    Cool completely, then wrap the whole slab or individual bars tightly in plastic wrap, then foil. Freeze for up to 3 months. Thaw at room temperature for 1‑2 hours. Do not freeze with glaze – add glaze after thawing.

    Freezer (Unbaked)

    Assemble the bars completely (without glaze) but do not bake. Cover tightly and freeze for up to 2 months. Bake from frozen at 375°F for 40‑45 minutes (add 10 minutes to baking time).

    Make Ahead for a Party

    Bake the bars 1‑2 days ahead, cool, cover, and store at room temperature. Add glaze the day of serving for the freshest look.

    What to Serve with Cherry Crumble Bars

    • Vanilla ice cream – Classic pairing.
    • Whipped cream – Light and airy.
    • A dusting of powdered sugar – Simple elegance.
    • A cup of hot coffee or black tea – Perfect afternoon treat.
    • Alone – they are complete on their own.

    Frequently Asked Questions

    Can I use canned cherry pie filling?

    Yes. This is a great shortcut. Use one 21‑oz can of cherry pie filling. You do not need to add sugar, cornstarch, or lemon juice. Simply spread the pie filling over the crust and proceed with the recipe.

    Can I use frozen cherries?

    Yes. Do not thaw them first. Cook them with the sugar and cornstarch as directed; frozen cherries will release more liquid, so you may need to cook a minute or two longer to thicken.

    Why are my bars soggy on the bottom?

    A soggy bottom usually means the crust was not pressed firmly enough or the filling was too runny. Press the crust very firmly, and make sure your cherry filling is thick and jammy. Also, avoid adding extra liquid to the filling.

    How do I get clean, even cuts?

    Let the bars cool completely (at least 2 hours). For the cleanest cuts, refrigerate for 30 minutes before slicing. Use a sharp chef’s knife and wipe the blade clean between cuts.

    Can I reduce the sugar?

    You can reduce the sugar in the crust to ¾ cup (150g) without significantly affecting texture. The filling sugar can be reduced based on the sweetness of your cherries – tart cherries need more sugar, sweet cherries need less.

    How many calories are in a cherry crumble bar?

    One bar (1/16 of the recipe) contains approximately 280‑350 calories, 14g fat, 44g carbohydrates, and 4g protein. This is a satisfying fruit dessert – perfect for bake sales and special occasions.

    Can I use other fruits?

    Absolutely. This recipe works beautifully with blueberries, raspberries, blackberries, peaches, nectarines, or apples. Adjust sugar and cooking time based on the fruit’s water content.

    The History of Fruit Crumble Bars

    Fruit crumble bars (also called fruit slab pies or streusel bars) are a beloved American dessert that gained popularity in the mid‑20th century. They combine the comfort of a fruit pie with the portability of a bar cookie, making them ideal for bake sales, picnics, and lunchboxes. The cherry version is especially popular in the Midwest and Pacific Northwest, where cherry orchards thrive. This recipe honors that tradition, using simple, wholesome ingredients and a buttery, crumbly topping that has stood the test of time.

    Why You Should Make These Cherry Crumble Bars This Week

    You probably have flour, sugar, butter, and eggs in your kitchen. Fresh or frozen cherries are easy to find (or you can use pie filling). In under 20 minutes of active prep, you can create a dessert that will impress everyone. They are perfect for:

    • Bake sales and school fundraisers – Always a top seller.
    • Potlucks and family reunions – Portable and feeds many.
    • Holiday dessert tables (Fourth of July, Thanksgiving, Christmas) – Red and festive.
    • Weekend baking with kids – They can help press the crust and sprinkle topping.
    • When you need a simple, impressive dessert – Looks complicated, but it is not.

    The first time I made cherry crumble bars, I had a bag of frozen cherries that needed using. I was skeptical about how they would turn out. The bars were gone within an hour – my family devoured them. Now I make them every summer with fresh cherries from the farmer’s market, and they never last more than a day.

    So pit those cherries, crumb that topping, and get ready to bake the most delicious, buttery, fruit‑filled cherry crumble bars of your life.

    Final Thoughts

    Cherry Crumble Bars are proof that the best desserts are often the simplest. A buttery crust, a jammy cherry filling, and a crunchy streusel topping come together in a bar that is portable, shareable, and utterly addictive. Whether you keep the classic recipe or experiment with blueberries, peaches, or apples, these bars will earn a permanent spot in your baking rotation. This truly is the best fruit crumb bar recipe for any occasion.

    So go ahead – make them this weekend. Cut them into generous squares. Share them with people you love. And enjoy every buttery, cherry‑filled, crumbly bite.


    Have you made cherry crumble bars? What’s your favorite twist – almond extract, a drizzle of glaze, or using a different fruit? Share your photos and tips in the comments below. And if this recipe became a bake sale hero, save it for later or send it to a friend who loves easy, delicious desserts.

  • Hello world!

    Welcome to WordPress. This is your first post. Edit or delete it, then start writing!