The Ultimate Homemade 3 Ingredient Chocolate Nougat Bars Better Than Store Bought
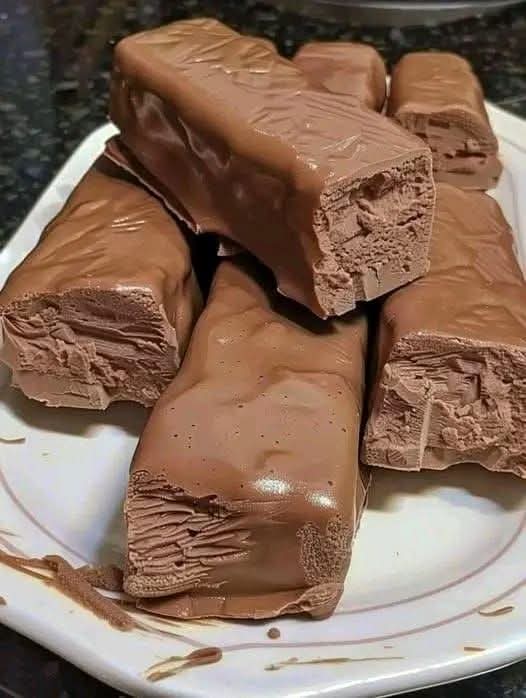
Nothing matches the pure nostalgia and indulgence of breaking into a rich, decadent chocolate candy bar. For generations, classic confectionery brands have captured our hearts with rows of glossy, milk-chocolate-coated treats lined up at the grocery checkout counter. However, a major shift toward mindful kitchen craftsmanship has inspired home bakers to recreate these beloved confections right in their own kitchens. Enter the ultimate homemade 3-ingredient chocolate nougat bars—an incredibly simple, melt-in-your-mouth candy that delivers professional candy-counter results with zero complicated pastry gear. As beautifully captured in the image 1000006369.jpg, these thick, artisanal bars feature a remarkably dense, whipped chocolate nougat core enveloped in a perfectly smooth, velvety chocolate coating. Whether you want an effortless weekend baking project or a show-stopping homemade gift for the chocolate lovers in your life, mastering this streamlined confectionery technique completely redefines home dessert making.
The Fascinating Evolutionary Journey of Nougat Confections
To truly appreciate the elegance of a simplified three-ingredient recipe, it helps to understand the complex history of traditional nougat. The word “nougat” traces back to the Old Provençal term nogat, which historically translates to “nut cake.” Traditional nougat is a historic sweet dating back thousands of years to the Middle East, where early confectioners whipped together local honey, beaten egg whites, sugar, and toasted nuts like pistachios or almonds to create a chewy white paste. As the technique traveled along trade routes into Southern Europe, it evolved into regional masterpieces like Italian torrone, Spanish turrón, and French nougat de Montélimar.
The Shift to Modern Chocolate Nougat Styles
During the industrial candy boom of the early 20th century, American and European confectionery manufacturers reinvented traditional egg-white nougat. To create lighter, fluffier fillings for modern candy bars, industrial kitchens began incorporating milk chocolate liquors, malted milk powders, and whipped corn syrups into the aeration process. This created a softer, malted chocolate paste that melted seamlessly when paired with standard milk chocolate coatings. The recipe featured in 1000006369.jpg pays direct homage to that beloved 20th-century American candy bar style, replicating that signature airy-yet-dense chocolate core using simple, accessible kitchen staples.
Deconstructing the 3 Essential Ingredients for Confectionery Success
When a recipe relies on only three distinct components, the quality of each ingredient and its physical behavior during preparation determines the success of your final dish. Skipping steps or selecting incorrect ingredient types can lead to a sticky, unmanageable syrup rather than the flawlessly structured, scoopable bars displayed in 1000006369.jpg.
1. High-Quality Chocolate Chips or Baking Bars
The primary flavor profile and structural integrity of both the inner filling and the outer shell rely completely on your chocolate selection. High-quality milk chocolate chips or premium milk chocolate baking bars with a high percentage of cocoa butter yield the smooth, sweet finish traditional to classic candy bars. If you prefer a less sweet, more sophisticated dessert profile, dark chocolate or semi-sweet baking bars work exceptionally well, providing a robust cocoa depth that balances the sweetness of the remaining ingredients.
2. Marshmallow Fluff or Jet-Puffed Marshmallow Creme
Traditional confectionery manufacturing requires boiling sugar syrups to highly precise temperature stages using candy thermometers. To bypass this complex, high-risk step at home, a jar of premium marshmallow creme or fluff acts as your ultimate secret shortcut. Marshmallow creme is essentially a professionally stabilized, perfectly aerated sugar matrix containing egg whites and corn syrup. When gently heated and folded into melted chocolate, it introduces millions of microscopic air bubbles, instantly mimicking the delicate, whipped texture of authentic industrial chocolate nougat.
3. Creamy Heavy Whipping Cream or Unsalted Butter
To ensure the chocolate nougat core remains soft, chewable, and melt-in-your-mouth smooth when cooled, a small amount of liquid fat must be introduced. Utilizing heavy whipping cream or high-quality unsalted butter breaks down the rigid crystalline structure of the hardening chocolate chips. This ensures the inner filling retains a rich fudge-like pliability that cuts cleanly into bars, preventing the nougat from turning rock-hard or crumbly once chilled in the refrigerator.
Step-by-Step Guide to Crafting Perfect Homemade Nougat Bars
Ingredients List
- 3 cups high-quality milk chocolate or semi-sweet chocolate chips (divided)
- 1 jar (7 to 7.5 ounces) premium marshmallow creme / marshmallow fluff
- 1/4 cup heavy whipping cream or 4 tablespoons unsalted butter
Step 1: Prepare the Confectionery Pan
Line an 8×8-inch or a 9×5-inch loaf baking pan with high-quality parchment paper, ensuring that the paper extends up and over the sides of the pan. These parchment “handles” are crucial, as they will allow you to easily lift the entire chilled block of candy out of the pan for clean slicing later on.
Step 2: Melt and Form the Bottom Chocolate Base
To create the sturdy outer shell that encapsulates the soft filling, place 1 cup of your chocolate chips into a heat-safe glass bowl. Microwave the chips in 30-second intervals, stirring vigorously between each session, until the chocolate is completely melted and velvety smooth. Pour the melted chocolate directly into the bottom of your lined pan, using an offset spatula to spread it into a thin, perfectly even layer. Tap the pan firmly against your kitchen counter to release any trapped air bubbles, then place the pan in your refrigerator for 10 to 15 minutes until the bottom shell is completely firm.
Step 3: Brew the Fluffy Chocolate Nougat Core
In a medium saucepan over low heat, combine the heavy whipping cream (or unsalted butter) with another 1 cup of chocolate chips. Stir constantly until the chocolate has completely melted into a thick, shiny ganache. Remove the pan from the heat source immediately. Scoop the entire jar of marshmallow creme into the warm chocolate ganache. Using a sturdy silicone spatula, fold the ingredients together vigorously. At first, the mixture may look separated, but continued stirring will smoothly emulsify the components into a uniform, thick, and pillowy chocolate nougat paste.
Step 4: Layer and Chill the Nougat Filling
Retrieve your baking pan from the refrigerator. Pour the warm chocolate nougat mixture directly over the hardened bottom chocolate layer. Working quickly before the nougat cools and thickens, use your spatula or a lightly greased offset tool to smooth the top surface into a flat, uniform layer. Return the pan to the refrigerator for at least 30 to 45 minutes to allow the marshmallow-infused core to set into a firm, sliceable block.
Step 5: Slice and Enrobe to Perfection
Once fully set, use the parchment paper flaps to lift the solid candy block out of the pan and place it onto a clean cutting board. Using a long, sharp chef’s knife dipped in warm water and wiped dry, slice the block into uniform rectangular bars, matching the classic proportions featured in 1000006369.jpg. Melt the remaining 1 cup of chocolate chips in the microwave. Using two forks, carefully dip each cut nougat bar into the melted chocolate, turning it to coat all four sides completely. Place the enrobed bars back onto a sheet of clean parchment paper, letting the excess chocolate pool slightly at the base to create that beautiful, rustic textured finish captured in 1000006369.jpg. Chill one final time for 15 minutes until the outer coating is glossy and set.
Professional Confectionery Tips for Flawless Results
Achieving the Perfect Clean Cut
Because the inner marshmallow nougat core is naturally thick and chewy, cutting through the bars can sometimes cause a bit of sticking. To achieve the razor-sharp, professional edges seen in the cross-section bars of 1000006369.jpg, always clean your knife blade between every single cut. Wiping the blade with a clean paper towel dipped in hot water heats the steel slightly, allowing it to glide effortlessly through the dense nougat without dragging or tearing the layers.
Managing Chocolate Temper and Gloss
If you want your finished candy bars to remain glossy at room temperature without melting easily on your fingertips, consider using premium chocolate melting wafers designed for candy making, or temper your chocolate using the seeding method. Alternatively, keeping the completed bars stored inside the refrigerator until right before serving ensures the outer milk chocolate coating retains a satisfying, crisp snap when you bite into the soft, velvety center.
Creative Flavor Variations for Gourmet Customization
While the basic three-ingredient chocolate profile is an undisputed classic, this simple recipe provides a brilliant canvas for building advanced flavor combinations that match your specific dessert cravings.
The Ultimate Salted Caramel and Peanut Layer
Transform your simple nougat bars into a crunchy, layered masterpiece by adding a classic Southern twist. Before pouring the final outer chocolate coating, spread a thin layer of high-quality homemade or store-bought caramel sauce across the top of the chilled nougat layer, and press a generous handful of roasted, salted peanuts into the caramel. Chill firmly before slicing and dipping in melted chocolate to create a rich, sweet, and salty combination.
The Crispy Malted Chocolate Bar
If you love the distinctive flavor of old-fashioned milkshakes, whisk 3 tablespoons of pure malted milk powder directly into the warm heavy cream and chocolate mixture before folding in your marshmallow creme. This infuses the fluffy nougat filling with a deep, nostalgic malted grain profile that balances the sweet chocolate perfectly, elevating the bar into a true artisanal delicacy.
The Espresso Dark Chocolate Twist
For a more grown-up, sophisticated flavor profile, substitute the milk chocolate chips entirely with dark bittersweet chocolate chips containing 60% or more cacao. As you melt the chocolate for the nougat filling, stir in 1 teaspoon of instant espresso powder or fine coffee granules. The coffee notes instantly amplify the natural fruitiness and depth of the dark cocoa, yielding a bold, deeply aromatic candy bar that pairs beautifully with an evening cup of coffee.
Proper Storage and Serving Etiquette
Because this homemade confection relies on a marshmallow creme shortcut without chemical shelf-life extenders, proper storage ensures your bars maintain their ideal texture and presentation. Always store the fully set bars in a single layer inside a clean, airtight container, using sheets of parchment paper between layers to prevent any potential sticking. When kept in a cool kitchen pantry away from direct sunlight, the bars will remain fresh and delicious for up to five days. For the ultimate texture, however, store the container inside your refrigerator, where the bars will stay perfectly firm and fresh for up to two weeks. Serving the bars straight from the fridge provides a delightfully crisp outer chocolate snap that contrasts elegantly with the slow, satisfying chew of the chilled nougat center. Freezing the fully assembled bars is not recommended, as the extreme cold can introduce condensation moisture that compromises the glossy finish of the outer chocolate shell upon thawing.
Conclusion: Reclaiming the Magic of Homemade Candy Making
Mastering the simple art of a 3-ingredient chocolate nougat bar proves that you do not need decades of professional pastry training to create breathtaking confections at home. By utilizing a clever marshmallow creme shortcut, focusing on gentle melting temperatures, and slicing your bars with clean precision, you can easily replicate the stunning, mouth-watering results showcased in 1000006369.jpg. Keep the essential ingredients stocked in your pantry for an effortless, crowd-pleasing dessert project that brings the nostalgic joy and pure luxury of an authentic old-school chocolate shop straight to your family’s table.