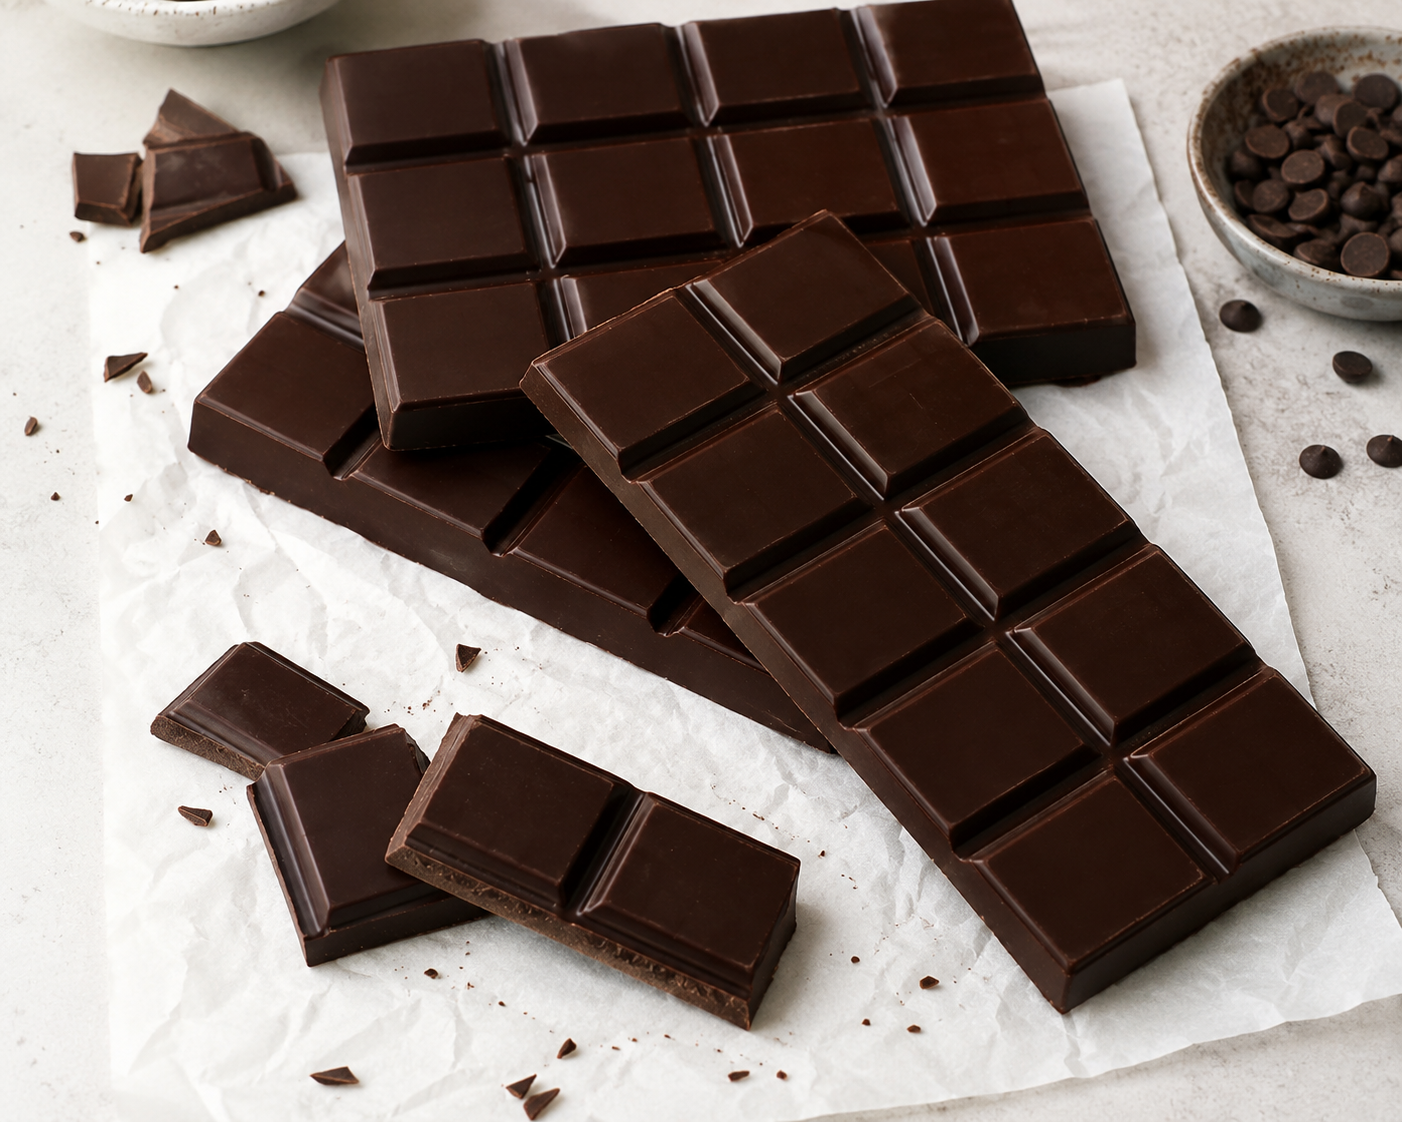
There are chocolate bars that are mass‑produced with additives, and then there are Homemade Chocolate Bars – the kind you make yourself with just a few simple ingredients, no complicated equipment, and endless flavor possibilities. Imagine a rich, creamy, melt‑in‑your‑mouth chocolate bar that you crafted with your own hands. You choose the cocoa percentage, the sweetness level, and the add‑ins – nuts, dried fruit, sea salt, or even a swirl of caramel. Making chocolate at home is not only satisfying but also surprisingly easy. You do not need a tempering machine or fancy molds (though they help). With cocoa butter (or coconut oil), cocoa powder, a sweetener, and a little patience, you can create chocolate bars that rival the finest artisanal brands. If you are searching for a homemade chocolate bars recipe that is customizable, healthier, and absolutely delicious, this is the one.
Whether you want dark, milk, or white chocolate; sugar‑free, keto, or vegan; studded with almonds, raspberries, or sea salt – this guide will teach you everything you need to know. Making chocolate at home also saves money, eliminates questionable additives, and makes wonderful homemade gifts. This DIY chocolate bars recipe will become a staple in your kitchen.
In this complete guide, you will learn the science of homemade chocolate, the master recipe, pro tips for a smooth, glossy finish, delicious variations (milk chocolate, white chocolate, mint, orange, or spicy), storage and gift ideas, and answers to all your questions about tempering, blooming, and troubleshooting. Let’s melt some cocoa butter.
Why Make Your Own Chocolate Bars?
Store‑bought chocolate often contains additives like soy lecithin, artificial flavors, and excessive sugar. Homemade chocolate lets you control every ingredient: use high‑quality cocoa powder, natural sweeteners (honey, maple syrup, or sugar‑free alternatives), and real vanilla. You can adjust the sweetness to your taste, add superfoods like maca or collagen, and avoid dairy if desired. Plus, homemade chocolate makes a heartfelt gift – wrap it in parchment and tie with a ribbon. This is a healthy homemade chocolate recipe that puts you in control.
Here is why you will love it:
Only 4‑5 basic ingredients – Cocoa butter, cocoa powder, sweetener, vanilla, salt.
No special equipment needed – A double boiler, a mold, and a whisk.
Customizable – Dark, milk, white, flavored, or loaded with mix‑ins.
Healthier than store‑bought – No preservatives, no soy lecithin, less sugar.
Great for gifts – Beautifully wrapped homemade chocolate is always appreciated.
Fun for kids – A magical kitchen science project.
Keto, vegan, and sugar‑free options – Adaptable to any diet.
Once you try this easy homemade chocolate candy, you will never look at store‑bought bars the same way.
The Science of Homemade Chocolate – Understanding the Ingredients
Chocolate is an emulsion of cocoa solids (from cocoa powder) and cocoa butter (the natural fat of the cacao bean). Commercial chocolate also contains sugar, milk solids (for milk chocolate), and emulsifiers like soy lecithin. At home, you can skip the emulsifiers and still achieve great results with careful mixing. Cocoa butter is the key – it gives chocolate its snap and melt‑in‑your‑mouth quality. Coconut oil can be substituted but will result in a softer, less snappy chocolate that melts faster at room temperature. Cocoa powder provides the chocolate flavor and color. Sweetener can be powdered sugar, coconut sugar, maple syrup, honey, or sugar‑free alternatives. Vanilla and a pinch of salt round out the flavors. This is a from scratch chocolate bar that works every time.
The Complete Homemade Chocolate Bars Recipe (Base Dark Chocolate)
This recipe makes about 8‑10 small bars (depending on your mold) or one large 8×4 inch bar. It can easily be doubled.
Ingredients – For Dark Chocolate:
½ cup (120ml) cocoa butter – food grade, unrefined (or refined for neutral flavor)
½ cup (40g) unsweetened cocoa powder (Dutch‑processed for smoother flavor)
¼ cup (50g) powdered sugar or coconut sugar (see notes for sugar‑free)
1 teaspoon vanilla extract (or vanilla bean paste)
Pinch of sea salt
For Milk Chocolate Variation (Add):
- 2 tablespoons milk powder (whole milk powder or coconut milk powder for vegan)
For White Chocolate Variation:
- Omit cocoa powder
- Add ½ cup milk powder
- Use ⅓ cup powdered sugar (white chocolate is sweeter)
Optional Add‑Ins:
¼ cup chopped almonds, hazelnuts, or pecans
2 tablespoons dried cranberries or cherries
2 tablespoons crushed freeze‑dried raspberries or strawberries
1 tablespoon orange zest
¼ teaspoon peppermint extract
Flaky sea salt for topping
1 tablespoon chia seeds or hemp hearts
Equipment:
Double boiler or a heatproof bowl over a saucepan
Silicone chocolate bar mold (or an ice cube tray, loaf pan lined with parchment)
Whisk or silicone spatula
Fine‑mesh sieve (for sifting cocoa powder)
Instant‑read thermometer (optional but helpful for tempering)
Step‑by‑Step Instructions
Step 1 – Prepare the Mold
Place your silicone chocolate bar mold on a flat, sturdy baking sheet (makes it easier to move without spilling). If using a rigid plastic mold, ensure it is clean and dry. For a rustic slab, line a small loaf pan or 8×4 inch baking dish with parchment paper.
Step 2 – Melt the Cocoa Butter
In a double boiler (or a heatproof bowl set over a saucepan of barely simmering water), gently melt the cocoa butter over low heat. Stir occasionally. Do not overheat – cocoa butter should be just melted (around 100‑110°F / 38‑43°C). Overheating can ruin the texture and flavor. If using coconut oil, melt the same way.
Step 3 – Sift and Whisk in the Cocoa Powder
Sift the unsweetened cocoa powder through a fine‑mesh sieve into the melted cocoa butter to prevent lumps. Whisk vigorously until completely smooth and glossy. The mixture will thicken slightly.
Step 4 – Add Sweetener, Vanilla, and Salt
Add your sweetener (powdered sugar or coconut sugar) and whisk until dissolved. If using granulated sugar, it may not dissolve fully; powdered sugar is best. Add the vanilla extract and a pinch of sea salt. If making milk chocolate, whisk in the milk powder now. Taste the mixture – it should be rich and chocolatey. Adjust sweetness if needed.
Step 5 – Temper the Chocolate (Optional but Recommended)
Tempering is the process of heating and cooling chocolate to specific temperatures so that it sets with a glossy finish and a clean snap. Untempered chocolate may have white streaks (bloom) and a softer texture. For home use, you can skip tempering, especially if you store the chocolate in the refrigerator. However, for professional results, follow this simple tempering method:
After melting the cocoa butter (100‑110°F), cool the mixture to 82‑84°F (28‑29°C) by stirring occasionally or placing the bowl in an ice bath briefly.
Then gently reheat to 88‑90°F (31‑32°C) for dark chocolate (86‑88°F for milk/white). Use a thermometer.
Test by spreading a small amount on a piece of parchment – it should set within 3‑5 minutes with a glossy finish.
If you do not temper, the chocolate will still taste delicious but may have a softer snap and may bloom (white streaks). For everyday homemade chocolate, simply pour the melted mixture into molds and refrigerate.
Step 6 – Add Mix‑Ins and Pour
If using nuts, dried fruit, or other add‑ins, sprinkle them into the molds first, or stir them into the chocolate before pouring. Pour the chocolate mixture into each cavity of the mold, filling to the top. Tap the baking sheet gently on the counter to release air bubbles. If you want a swirl or layered effect, add different colors or flavors.
Step 7 – Set in the Fridge or Freezer
Place the mold in the refrigerator for 30‑45 minutes, or in the freezer for 15‑20 minutes, until completely firm. The chocolate is ready when it easily releases from the mold and has a solid snap.
Step 8 – Unmold and Store
Flex the silicone mold to release the chocolate bars. If using a rigid mold, tap gently upside down on a clean surface. Your homemade chocolate bars are ready to enjoy.
Pro Tips for Perfect Homemade Chocolate Bars
Follow these expert tips for a smooth, glossy homemade chocolate bar every time:
Use high‑quality cocoa butter – The flavor of your chocolate depends heavily on the cocoa butter. Unrefined cocoa butter has a natural chocolatey aroma; refined is neutral. Look for food grade cocoa butter online or at health food stores.
Powder your sweetener – Granulated sugar will not dissolve in fat and will leave a gritty texture. Blend granulated sugar in a coffee grinder to make powdered sugar, or use confectioners’ sugar.
Sift cocoa powder – Clumps will ruin the texture. Always sift.
Do not overheat – Cocoa butter is sensitive. Keep temperatures below 120°F (49°C). Use a thermometer for best results.
Tempering is optional for fridge storage – If you plan to keep your chocolate in the refrigerator, you can skip tempering. It will still taste amazing. For shelf‑stable chocolate that stays glossy at room temperature, tempering is essential.
Use silicone molds – They are flexible, non‑stick, and produce beautiful, professional‑looking bars. They are inexpensive and reusable.
Store properly – Keep chocolate in an airtight container in a cool, dark place (65‑70°F). Refrigeration is fine but can cause condensation. If refrigerating, wrap tightly to prevent moisture.
Experiment with flavors – A drop of peppermint, a pinch of cayenne, or a swirl of peanut butter can transform your chocolate.
Delicious Variations (Same Base Recipe)
Once you master the basic dark chocolate bar, try these fun twists. These chocolate bar variations will keep your homemade candy exciting.
1. Almond Dark Chocolate Bar
Add ¼ cup of roasted, chopped almonds to the bottom of the molds before pouring. Sprinkle a little flaky sea salt on top. This is a homemade almond chocolate bar that rivals any store‑bought version.
2. Mint Chocolate Bar
Add ½ teaspoon of peppermint extract (not mint flavoring) to the chocolate mixture. Sprinkle crushed sugar‑free candy canes on top for a festive touch. This is perfect for the holidays.
3. Orange Chocolate Bar
Add 1 tablespoon of orange zest and ¼ teaspoon of orange extract. The bright, citrusy flavor is wonderful. Use dark chocolate for a classic combination.
Add 2 tablespoons of crushed freeze‑dried raspberries to the chocolate. The tart, fruity bits add color and flavor. You can also use freeze‑dried strawberries.
5. Salted Caramel Dark Chocolate Bar
Make a quick sugar‑free caramel by simmering ½ cup of coconut cream with ¼ cup of allulose and 2 tablespoons of butter. Cool slightly, then swirl into the chocolate before setting. Top with flaky sea salt.
Add ¼ cup of unsweetened shredded coconut to the chocolate mixture. Use coconut sugar as the sweetener for an extra coconut flavor. This tastes like a mounds bar.
7. Keto / Sugar‑Free Chocolate Bar
Replace the powdered sugar with powdered erythritol or monk fruit sweetener. Use a 1:1 ratio. This sugar free homemade chocolate is perfect for keto and diabetic diets.
Omit the cocoa powder. Use ½ cup cocoa butter, ½ cup milk powder, ⅓ cup powdered sugar, vanilla, and salt. White chocolate is sweeter and creamier. Add dried cranberries and pistachios for a festive bar.
How to Store, Gift, and Make Ahead
Refrigerator
Store chocolate bars in an airtight container in the refrigerator for up to 3 months. If not tempered, refrigeration is recommended to maintain shape and prevent blooming. Bring to room temperature for 10‑15 minutes before serving.
Freezer
Chocolate freezes well. Wrap bars tightly in plastic wrap and place in a freezer bag. Freeze for up to 6 months. Thaw in the refrigerator overnight.
Room Temperature (Tempered Only)
If you properly tempered the chocolate, bars can be stored at cool room temperature (65‑70°F) in an airtight container for up to 2 months. Do not expose to heat or direct sunlight.
Gifting Ideas
Wrap each chocolate bar in parchment paper or wax paper, then place in a cellophane bag or a small decorative box. Tie with a ribbon and attach a handwritten tag. Homemade chocolate bars make wonderful gifts for holidays, birthdays, or hostess thank‑yous. You can also include a small card listing the ingredients – a thoughtful touch for friends with dietary restrictions.
Troubleshooting Common Chocolate Problems
Chocolate is grainy – Sweetener was not powdered, or cocoa powder was not sifted. Use powdered sweetener and sift cocoa.
Chocolate won’t come out of the mold – Silicone molds are best. If using rigid plastic, chill longer and tap firmly. You can also place the mold in the freezer for 15 minutes.
White streaks (bloom) – This is fat bloom caused by improper tempering or temperature fluctuations. It is safe to eat and does not affect flavor. To prevent, temper the chocolate or store in the refrigerator.
Chocolate is too soft at room temperature – Too much coconut oil or not enough cocoa butter. Use cocoa butter for a firmer snap. If you used coconut oil, expect a softer chocolate – store in the fridge.
Chocolate has a waxy mouthfeel – Too much cocoa butter or not enough cocoa powder. Adjust the ratio next time (use ⅓ cup cocoa butter to ½ cup cocoa powder).
Chocolate is bitter – Cocoa powder quality varies. Use Dutch‑processed cocoa for a smoother, less bitter flavor. Increase sweetener slightly.
Health Benefits of Homemade Dark Chocolate
Dark chocolate made with high‑quality cocoa is rich in antioxidants (flavonoids) that may support heart health, reduce inflammation, and improve brain function. By making your own, you can avoid refined sugar, dairy, and additives. Use raw cocoa powder and natural sweeteners like coconut sugar or monk fruit for an even healthier treat. This healthy homemade dark chocolate is a guilt‑free indulgence.
Why You Should Make Homemade Chocolate Bars This Week
You probably have cocoa powder and sweetener in your pantry. Cocoa butter can be ordered online or found at health food stores. In about 30 minutes, you can create chocolate bars that look and taste like they came from a high‑end chocolatier. It is perfect for:
Homemade gifts for holidays, birthdays, or thank‑yous – Thoughtful and personal.
Healthy snacking – Control the sugar and ingredients.
Keto, vegan, or sugar‑free diets – Easily adaptable.
Fun kitchen projects with kids – They will love pouring and decorating.
Saving money – Artisan chocolate bars are expensive; homemade costs a fraction.
The first time I made homemade chocolate bars, I was amazed at how simple it was. The rich, deep flavor and smooth texture were far superior to any store‑bought bar. Now I make them regularly for gifts and for myself. My family requests them for every holiday.
So melt that cocoa butter, sift that cocoa powder, and get ready to make the richest, creamiest, most delicious homemade chocolate bars of your life.
Final Thoughts
Homemade Chocolate Bars are proof that you do not need a chocolate factory to create something truly special. With just a few ingredients and a little patience, you can craft bars that are richer, creamier, and healthier than anything from a store. Whether you keep the classic dark chocolate or experiment with almonds, mint, or sea salt, these bars will earn a permanent spot in your kitchen. This truly is the best homemade chocolate recipe for gifts and everyday indulgence.
So go ahead – make them today. Wrap them in parchment, tie with a ribbon, and share them with someone you love. And enjoy every smooth, rich, melt‑in‑your‑mouth bite.
Have you made homemade chocolate bars? What’s your favorite flavor – almond, mint, or orange? Share your photos and tips in the comments below. And if this recipe became a new tradition, save it for later or send it to a friend who loves homemade treats.